
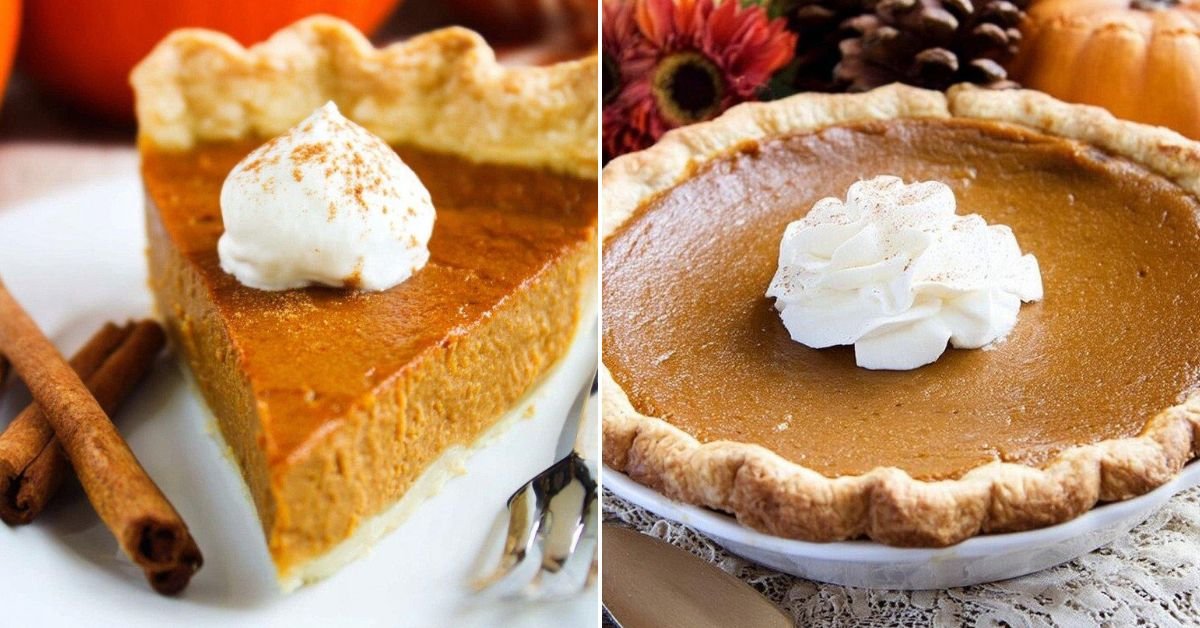
You know what? I’ve been making pumpkin pie for years, and I can tell you this pumpkin pie recipe is hands down the best one I’ve tried. We’re talking about that perfect balance of spices, creamy filling, and a flaky crust that’ll make your taste buds do a happy dance. Now, I get it. Some folks think pumpkin pie is complicated, but trust me, this simple pumpkin pie recipe is easier than you think. And here’s the thing: we’re using real pumpkin in this fresh pumpkin pie recipe (though canned works great too, I won’t judge). This real pumpkin pie recipe gives you that authentic flavor that just can’t be beat. What makes this a healthy pumpkin pie recipe? Well, we’re not going crazy with the sugar, and you can even swap in some lighter options if you want. Plus, this pumpkin pie recipe with real pumpkin is packed with vitamins. Best part? This pumpkin pie recipe without evaporated milk option means you can use what you have on hand. Whether it’s Thanksgiving or just a random Tuesday when you’re craving something sweet, this pie delivers every single time.
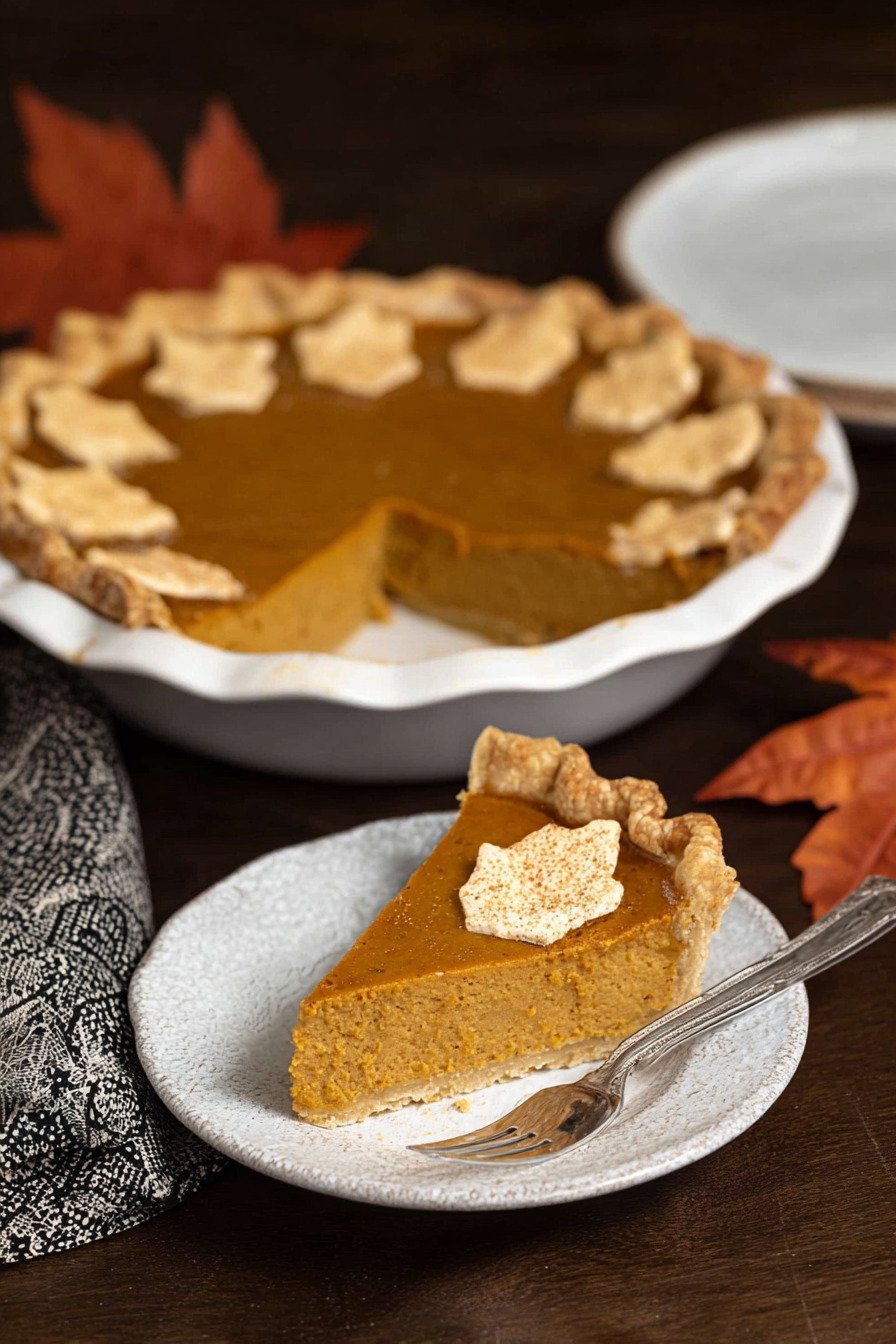
Table of Contents
- 1) Key Takeaways
- 2) Easy Classic Pumpkin Pie Recipe
- 3) Ingredients for Classic Pumpkin Pie
- 4) How to Make Classic Pumpkin Pie
- 5) Tips for Making Classic Pumpkin Pie
- 6) Making Classic Pumpkin Pie Ahead of Time
- 7) Storing Leftover Classic Pumpkin Pie
- 8) Try these Dessert next!
- 9) Classic Pumpkin Pie
- 10) Nutrition
1) Key Takeaways
- What spices go in pumpkin pie?
- Can you make pumpkin pie without evaporated milk?
- How do you know when pumpkin pie is done baking?
- Should pumpkin pie be refrigerated after baking?
2) Easy Classic Pumpkin Pie Recipe
Listen, I’ve made more pumpkin pies than I can count, and this pumpkin pie recipe is the one I keep coming back to. Why? It just works. Every. Single. Time. We’re talking about a pie that’s creamy, perfectly spiced, and sitting pretty in a golden, flaky crust that makes people think you spent hours in the kitchen.
Here’s the beautiful thing about this simple pumpkin pie recipe: you don’t need fancy equipment or culinary school credentials. If you can whisk ingredients together and pour them into a crust, you’re golden. I remember the first time I made this for Thanksgiving, I was so nervous. Turns out, I worried for nothing. The whole pie disappeared before dessert was officially served!
What sets this recipe apart is how forgiving it is. Mess up the timing a little? No big deal. Don’t have every single spice? Work with what you’ve got. This real pumpkin pie recipe adapts to your kitchen, not the other way around. And that’s exactly how cooking should be, right?
The best part is you can make this any time of year, not just for the holidays. Had a rough week? Make yourself a pumpkin pie. It’s cheaper than therapy and way more delicious. Trust me on this one. Once you nail this recipe, you’ll be the person everyone asks to bring dessert.
3) Ingredients for Classic Pumpkin Pie
Pumpkin Puree: You can go two ways here. Grab a can from the store (I won’t judge, I do it all the time), or roast your own pumpkin if you’re feeling ambitious. Just make sure it’s pure pumpkin, not pumpkin pie filling. That stuff already has spices and sugar, and we want control over our flavor here. When I use fresh pumpkin for my fresh pumpkin pie recipe, I pick sugar pumpkins. They’re smaller, sweeter, and way easier to work with than those massive carving pumpkins.
Granulated Sugar: This sweetens everything up without being cloying. Some folks like to cut back on the sugar, and you know what? Go for it. Start with less and taste as you go. I’ve done half white sugar and half brown sugar before, and it adds this nice caramel note that people rave about. Your pie, your rules.
Cinnamon: The star of the spice show. Good quality cinnamon makes a difference you can actually taste. I learned this the hard way when I used some cinnamon that had been sitting in my cabinet since 2019. Fresh spices matter, people! If your cinnamon smells like cardboard, toss it and get new stuff.
Ginger: This gives the pie that little kick of warmth. Ground ginger is what we need here. Fresh ginger is amazing in lots of things, but for this healthy pumpkin pie recipe, stick with the powdered stuff. It distributes evenly and doesn’t mess with the texture.
Salt: Never skip the salt. It might seem weird to add salt to a dessert, but it makes all the other flavors pop. Without it, your pie tastes flat and boring. Just a half teaspoon does the trick.
Nutmeg: A little goes a long way here. Too much nutmeg and your pie tastes like Christmas potpourri. Just enough, and you get this cozy, warm feeling with every bite. If you’ve got whole nutmeg and a microplane, even better. Freshly grated nutmeg is next level.
Ground Cloves: This is what gives pumpkin pie that distinctive flavor. Cloves are strong, so we only use a quarter teaspoon. I once accidentally dumped in a whole teaspoon, and let me tell you, that was a learning experience. Measure carefully with this one!
Eggs: These bind everything together and give the filling its structure. Room temperature eggs mix in better, so pull them out of the fridge about 30 minutes before you start. If you forget (like I always do), just put them in a bowl of warm water for five minutes. Works like magic.
Evaporated Milk: This makes the filling super creamy and rich. Now, if you’re looking for a pumpkin pie recipe without evaporated milk, you can totally use heavy cream instead. Some people use regular milk, but it makes the filling less rich. Coconut milk works too if you’re going dairy free. I’ve tried them all, and they each bring something different to the table.
Pie Crust: Homemade or store bought, both work great. I’m not going to lie and say I make my crust from scratch every time. Sometimes I grab a frozen one from the store, and my pie still turns out amazing. If you do make your own crust, make sure it’s chilled before filling it. A warm crust equals a soggy bottom, and nobody wants that.
4) How to Make Classic Pumpkin Pie
Step 1: Crank your oven up to 425°F. I know it seems hot, but that initial blast of heat is what gets your crust perfectly golden and prevents it from getting soggy. While the oven preheats, you’ve got time to mix everything together. See? Already saving time.
Step 2: Get out your biggest mixing bowl and dump in the pumpkin puree. Add the sugar and all those gorgeous spices: cinnamon, ginger, salt, nutmeg, and cloves. Whisk it all together until it’s smooth and everything’s combined. Your kitchen should smell incredible right about now. If it doesn’t, check your spices. They might be old.
Step 3: Crack in those eggs, one at a time. I like to beat each one in completely before adding the next. This helps everything emulsify properly and gives you a smoother filling. My grandma taught me this trick, and she made the best pies I’ve ever tasted, so I’m sticking with her method.
Step 4: Pour in the evaporated milk slowly while stirring. You want this to be completely smooth with no lumps. If you see any lumps of spice or pumpkin, keep whisking. The mixture should be pourable but not too thin. It should coat the back of a spoon nicely.
Step 5: Grab your pie crust and give it a quick once over. Make sure there are no cracks or tears. If there are, just pinch them together with your fingers. Nobody will ever know. Pour the filling into the crust, and here’s a pro tip: don’t fill it all the way to the top. Leave about a quarter inch of space. This prevents spillovers when you’re moving it to the oven.
Step 6: Slide that beauty into your hot oven. Set a timer for 15 minutes. This high heat start is what sets the edges and gets things cooking. After 15 minutes, turn the temperature down to 350°F. Don’t open the oven door yet! Just adjust the temperature and set another timer for 40 minutes.
Step 7: Around the 40 minute mark, start checking for doneness. The edges should be set and slightly puffed, but the center should still have a little jiggle to it. Think Jello that’s almost set. If you stick a knife in about an inch from the edge, it should come out clean. If it’s still wet, give it another 5 to 10 minutes.
Step 8: Pull it out and resist the urge to dig in immediately. I know, I know, it smells amazing. But cutting into a hot pie is a recipe for disaster. The filling needs time to set up properly. Let it cool on a wire rack for at least two hours. Yes, two whole hours. Go watch a movie or something. The wait is worth it, I promise.
5) Tips for Making Classic Pumpkin Pie
Let me share some tricks I’ve picked up over the years. First off, blind baking your crust is optional, but it does help prevent a soggy bottom. If you’ve got the time, pop that empty crust in the oven for about 10 minutes before adding the filling. Just prick the bottom with a fork first so it doesn’t puff up like a balloon.
Temperature matters more than you think. Starting hot and then lowering the heat gives you the best texture. That initial high heat sets the edges quickly, which helps the pie hold its shape. Then the lower heat gently cooks the center without overcooking the edges. It’s science, but delicious science.
Here’s something nobody tells you about making a pumpkin pie recipe with real pumpkin: if you’re using canned pumpkin straight from the fridge, let it come to room temperature first. Cold ingredients don’t mix as well, and you might end up with a grainy texture. Just set the can out on your counter while you gather everything else.
Watch your pie near the end of baking. Every oven is different, and yours might run hot or cold. If the edges of your crust start browning too fast, cover them with strips of aluminum foil. I keep a roll of foil near my oven for exactly this reason. It’s saved many pies from burning.
The jiggle test is your friend. When you gently shake the pie, the center should wobble slightly but the edges should be firm. If the whole thing sloshes around like a waterbed, it needs more time. If nothing moves at all, you might have overcooked it a bit. Don’t panic though, it’ll still taste good.
Room temperature eggs mix better, but if you forget to take them out ahead of time, here’s what I do. Fill a bowl with warm (not hot) water and let the eggs sit in it for about five minutes. They’ll warm right up, and your filling will be smoother. This little trick has saved me more times than I can count.
6) Making Classic Pumpkin Pie Ahead of Time
Good news: pumpkin pie gets better with time. I’m not even kidding. The flavors meld together overnight, and the texture becomes even more perfect. So if you’re planning ahead for Thanksgiving or any other gathering, make your pie the day before. Your future self will thank you.
Here’s what I do when I’m making pie ahead of time. I bake it completely, let it cool to room temperature, and then cover it loosely with plastic wrap or aluminum foil. Then it goes straight into the fridge. Don’t wrap it tightly while it’s still warm, or you’ll get condensation, and that makes everything soggy. Nobody wants soggy pie.
You can actually make this up to two days ahead. Any longer than that and the crust starts getting soft. The filling will still be fine, but the crust loses its texture. If you absolutely need to make it earlier, you can freeze it. Wrap it really well in plastic wrap and then foil. It’ll keep in the freezer for up to a month.
When you’re ready to serve a frozen pie, move it to the fridge the night before. Let it thaw slowly overnight. Don’t try to speed things up by leaving it on the counter. Slow thawing keeps the texture perfect. If you want to serve it warm (which is absolutely delicious), pop it in a 300°F oven for about 15 minutes before serving.
One more thing about making ahead: the crust holds up better if you let the pie cool completely before refrigerating. I used to rush this step and stick warm pie in the fridge. Bad idea. The temperature change made the crust weird and slightly tough. Patience pays off here. Let it cool completely on the counter first, then refrigerate.
7) Storing Leftover Classic Pumpkin Pie
So you’ve got leftover pie. First of all, congratulations on having the willpower to not eat the whole thing. Leftover pumpkin pie keeps beautifully in the fridge for up to four days. Just cover it with plastic wrap or aluminum foil and stick it in the coldest part of your fridge, usually the back of the bottom shelf.
Here’s a mistake I made early on: storing pie in an airtight container. Seems smart, right? Wrong. The pie needs a little air circulation, or the crust gets soft and mushy. Loose covering is the way to go. I use a pie keeper now, which is basically a large plastic dome. Best kitchen purchase I ever made.
Can you freeze leftover pumpkin pie? Absolutely. Cut it into individual slices and wrap each piece in plastic wrap, then put all the slices in a freezer bag. This way you can grab a single slice whenever the craving hits. They’ll keep in the freezer for up to two months. Thaw slices in the fridge overnight, or if you’re impatient like me, microwave them for about 30 seconds.
Some people ask if you can leave pumpkin pie out on the counter. The answer is technically no. This pie has eggs and dairy, which means it needs to be refrigerated after about two hours. I know it seems fussy, but food safety matters. Room temperature pie is a breeding ground for bacteria, and nobody wants to deal with food poisoning.
When you’re ready to eat leftover pie, you’ve got options. Some people love it cold straight from the fridge. Others (like me) prefer it at room temperature. Take your slice out about 20 minutes before eating. Or warm it up in the microwave for 20 to 30 seconds. Add a dollop of whipped cream or a scoop of vanilla ice cream, and you’ve got yourself a perfect little moment of happiness.
8) Try these Dessert next!

9) Classic Pumpkin Pie
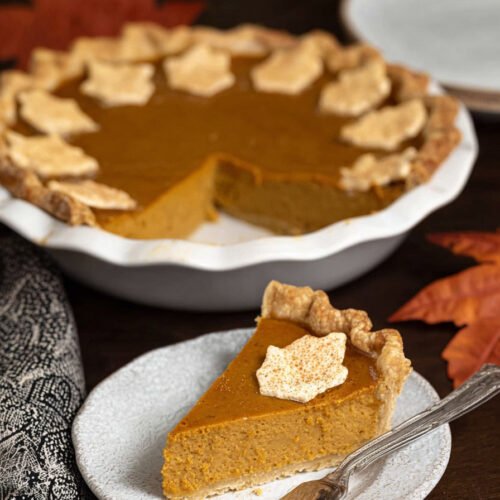
Pumpkin Pie Recipe: The Best Classic Homemade Version
Ingredients
For the Filling
- 1 (15 oz) can pumpkin puree (or 2 cups fresh pumpkin puree)
- 3/4 cup granulated sugar
- 1 teaspoon ground cinnamon
- 1/2 teaspoon ground ginger
- 1/2 teaspoon salt
- 1/4 teaspoon ground nutmeg
- 1/4 teaspoon ground cloves
- 2 large eggs
- 1 (12 oz) can evaporated milk (or 1 1/2 cups heavy cream)
- 1 unbaked 9-inch pie crust
Instructions
- Preheat your oven to 425°F. Trust me, that high heat at the start is key to getting the crust just right.
- In a large bowl, whisk together the pumpkin puree, sugar, cinnamon, ginger, salt, nutmeg, and cloves until everything’s nice and smooth.
- Beat in the eggs one at a time. I like to make sure each one’s fully mixed in before adding the next.
- Gradually stir in the evaporated milk (or cream if you’re going that route). The mixture should be silky and pourable.
- Pour the filling into your unbaked pie crust. Don’t overfill it, leave about 1/4 inch from the top.
- Pop it in the oven at 425°F for 15 minutes. This initial blast of heat sets everything up perfectly.
- After 15 minutes, reduce the temperature to 350°F and bake for another 40 to 50 minutes. You’ll know it’s done when a knife inserted near the center comes out clean.
- Let the pie cool on a wire rack for at least 2 hours before slicing. I know waiting is hard, but warm pie filling is messy!
- Serve with whipped cream or vanilla ice cream. Or both. I’m not here to judge your choices.
10) Nutrition
Serving Size: 1 slice (1/8 of pie), Calories: 316, Sugar: 28 g, Sodium: 308 mg, Fat: 13 g, Saturated Fat: 5.2 g, Carbohydrates: 46 g, Fiber: 3 g, Protein: 6 g, Cholesterol: 62 mg


Leave a Comment