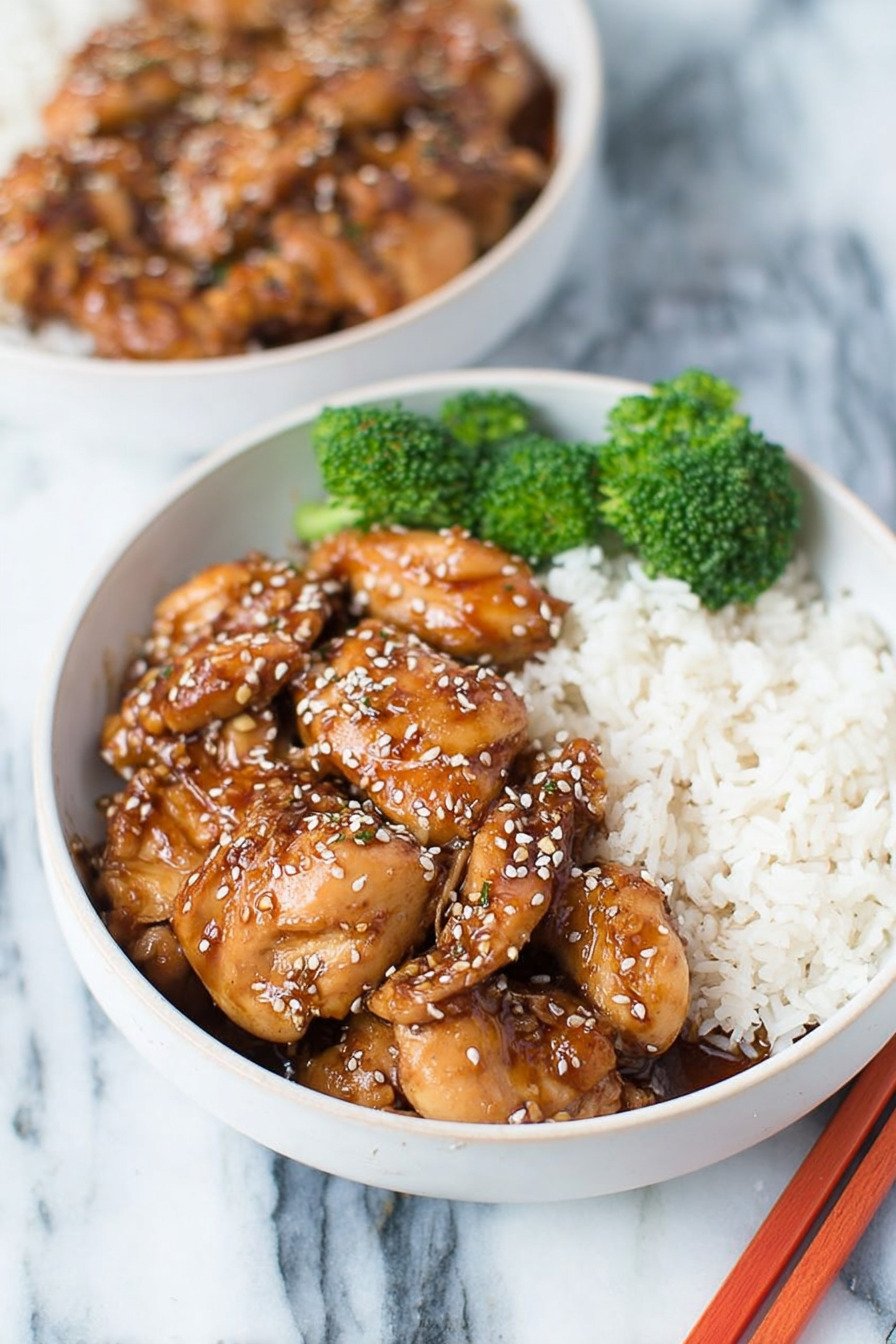
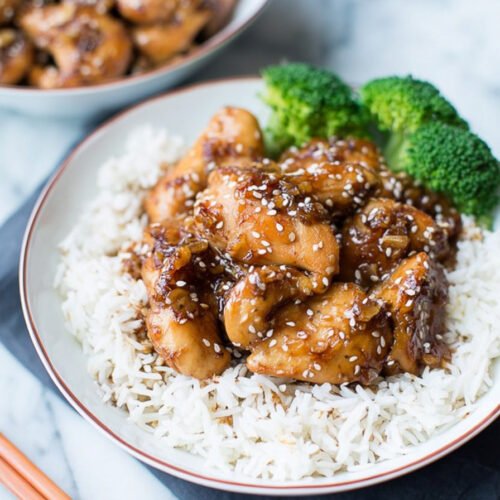
So, here’s the thing about weeknight dinners: we all need them to be quick, right? I mean, who’s got hours to spend in the kitchen after a long day? That’s where this Instant Pot chicken recipe swoops in like a superhero. I’ve been making this honey garlic chicken for months now, and my family asks for it at least twice a week. No joke. What I love most is how the pressure cooker turns ordinary boneless chicken breast into something ridiculously tender and juicy. You know how chicken breast can get all dry and sad? Yeah, not this time. The sweet and savory sauce clings to every piece of chicken, and when you shred it up and toss it back in? Pure magic. The whole thing comes together in about 15 minutes of actual cooking time. I’m talking from raw chicken to dinner on the table fast. Whether you’re new to your Instant Pot or you’ve been using it forever, this recipe just works. We usually serve it over rice with some steamed broccoli on the side, but honestly, it’s good enough to eat straight from the pot with a fork. Don’t tell anyone I said that.
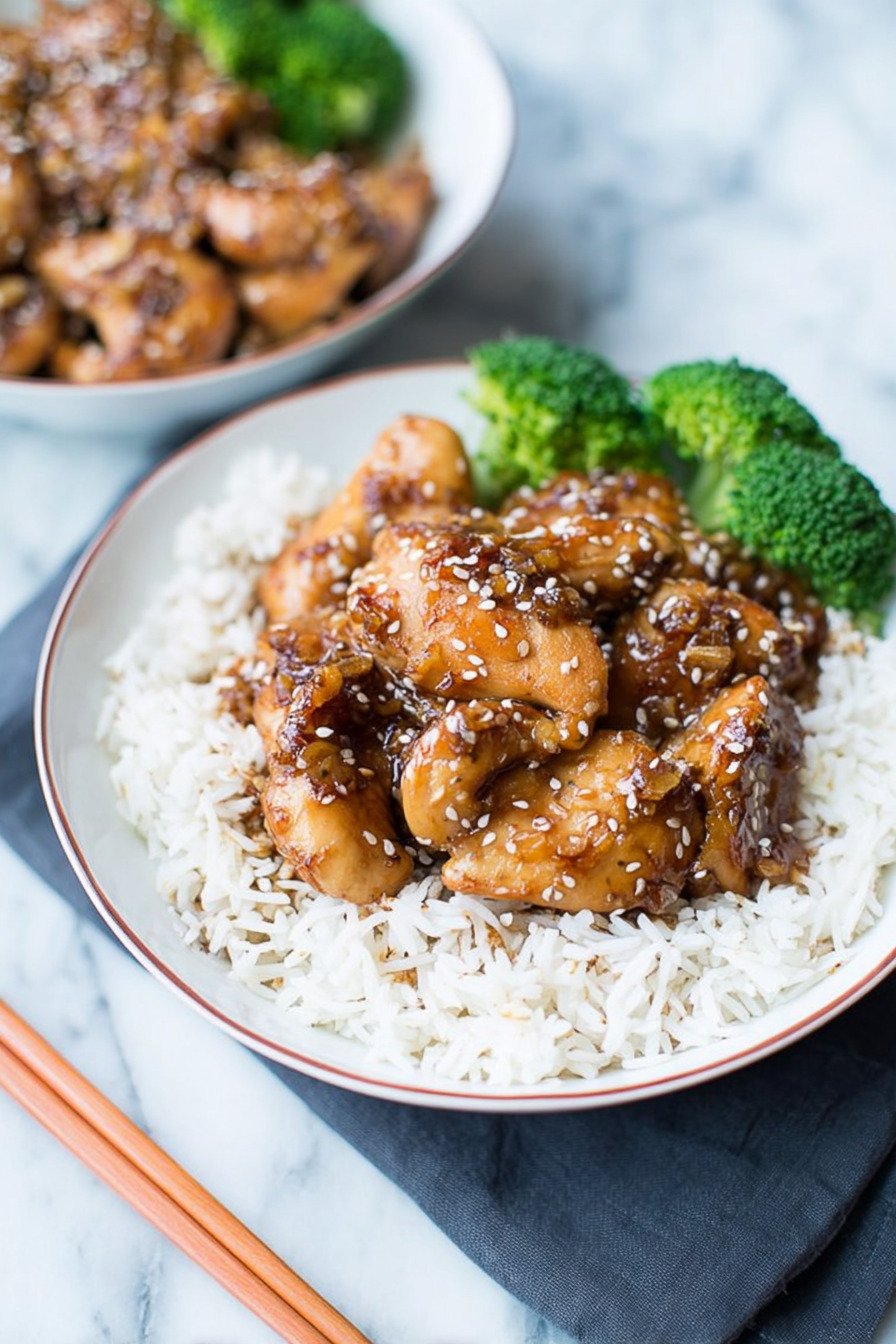
Table of Contents
- 1) Key Takeaways
- 2) Easy Instant Pot Honey Garlic Chicken Recipe
- 3) Ingredients for Instant Pot Honey Garlic Chicken
- 4) How to Make Instant Pot Honey Garlic Chicken
- 5) Tips for Making Instant Pot Honey Garlic Chicken
- 6) Making Instant Pot Honey Garlic Chicken Ahead of Time
- 7) Storing Leftover Instant Pot Honey Garlic Chicken
- 8) Try these Main Course next!
- 9) Instant Pot Honey Garlic Chicken
- 10) Nutrition
1) Key Takeaways
- Can you cook chicken breast in an Instant Pot without it getting dry?
- What makes honey garlic sauce so flavorful?
- How long does it take to cook chicken in a pressure cooker?
- Can you use frozen chicken breasts in this recipe?
2) Easy Instant Pot Honey Garlic Chicken Recipe
Let me tell you about my favorite weeknight dinner hack. This Instantpot Chicken Recipes collection wouldn’t be complete without this honey garlic version. I’ve tried dozens of Boneless Chicken Breast Recipes over the years, and this one beats them all for speed and flavor. When I first got my Instant Pot, I was skeptical about cooking chicken in it. Would it turn out rubbery? Would the sauce be watery? Spoiler alert: neither happened.
The genius of this recipe is how the pressure cooker locks in moisture. We’re talking juicy, tender chicken that practically falls apart when you touch it with a fork. The honey garlic sauce? It’s sticky, sweet, savory, and has just enough kick from the sriracha to keep things interesting. My kids devour this stuff, and my husband’s asked me to add it to our permanent dinner rotation.
What really sold me on this Instantpot Chicken Recipes approach was the time factor. From start to finish, you’re looking at about 25 minutes total. Compare that to traditional Baked Chicken methods that can take 45 minutes or more, and you’ll see why this became my go-to. The Best Instant Pot Recipe I’ve found for busy families who still want something that tastes homemade and delicious. No complicated steps, no fancy ingredients you can’t pronounce, just good food that happens fast.
I love how forgiving this recipe is too. Forgot to thaw your chicken? No problem. The frozen method works just as well. Want to use chicken thighs instead of breasts? Go for it. This recipe adapts to whatever you’ve got on hand, which makes it perfect for those nights when you’re winging it. If you’re used to 3 Ingredient Crockpot Recipes, you’ll appreciate how this Instant Pot version delivers complex flavors with minimal effort. And trust me, it’s way more exciting than most Baked Chicken Tenderloins recipes out there.
3) Ingredients for Instant Pot Honey Garlic Chicken
Boneless Chicken Breasts: The star of our show here. I usually grab a pack of four medium-sized breasts, around 500 to 600 grams total. Now, chicken breast gets a bad rap for being dry and boring, but not when you cook it this way. The pressure cooker keeps everything moist and tender. If your breasts are on the larger side, like those monster ones you sometimes find at the store, just use three instead of four. They’ll cook through perfectly without overcrowding the pot.
Chicken Stock: Just a quarter cup does the trick. This isn’t about making soup; it’s about creating enough liquid for the Instant Pot to build pressure. Some folks ask if they can skip this, and honestly, you can if you’re using frozen chicken since it releases plenty of liquid on its own. But for fresh chicken, that little bit of stock makes all the difference in getting your pot up to pressure quickly.
Soy Sauce: This brings that savory, umami punch that makes the sauce so addictive. We use about a third of a cup, which sounds like a lot, but it balances beautifully with the honey. I stick with regular soy sauce, not the low-sodium stuff, because we need that salt to round out all the flavors. If you’re gluten-free, tamari works just as well here. The sauce won’t be quite as dark, but the taste is nearly identical.
Garlic: One tablespoon of minced garlic might not sound like much, but it packs a serious flavor wallop when it cooks under pressure. I usually use the jarred minced garlic from the fridge because it’s easy and I always have it on hand. Fresh garlic works great too if you want to get all fancy and mince it yourself. Either way, that garlicky aroma when you open the pot is absolutely incredible.
Ginger: Just a teaspoon of minced ginger adds a subtle warmth that complements the garlic perfectly. Ginger and garlic are like the dynamic duo of Asian cooking, and they work their magic here too. I keep a jar of minced ginger in my fridge right next to the garlic. Makes life so much easier when you’re trying to get dinner on the table fast.
Honey: Half a cup of honey brings the sweetness that makes this sauce so crave-worthy. It’s not candy-sweet, though. The honey mellows out under pressure and mixes with the soy sauce to create this perfect sweet-and-salty balance. I’ve tried making this with maple syrup when I ran out of honey once, and it worked pretty well, but honey gives you that thicker, stickier sauce that clings to the chicken beautifully.
Sriracha: One tablespoon adds just enough heat to wake up your taste buds without setting your mouth on fire. I love that little kick, but if you’ve got picky eaters or kids who don’t do spicy, you can cut this back or leave it out completely. The sauce will still taste amazing without it. On the flip side, if you’re a heat lover like me, feel free to add an extra squirt.
Water and Cornstarch: This is your thickening agent. We mix two tablespoons of cornstarch with a quarter cup of water to create what’s called a slurry. After the chicken cooks, you’ll stir this into the sauce while it’s on sauté mode, and it transforms that thin cooking liquid into a gorgeous, glossy sauce that coats the chicken like a dream. Don’t skip this step. It’s what takes the recipe from good to great.
4) How to Make Instant Pot Honey Garlic Chicken
Step 1. Start by placing your chicken breasts into the Instant Pot. Just lay them flat in the bottom of the inner pot. No need to arrange them perfectly or worry about overlapping a tiny bit. The pressure cooker doesn’t care about presentation at this stage. I sometimes give them a quick pat with a paper towel if they’re super wet, but that’s totally optional. The main thing is getting them in there so you can move on to the good stuff.
Step 2. Pour in all your sauce ingredients right over the chicken. That means the chicken stock, soy sauce, minced garlic, minced ginger, honey, and sriracha all go in together. Give everything a quick stir with a spoon just to combine the liquids a bit. You want that honey to mix in with the soy sauce instead of just sitting in a blob on top. The chicken will get coated as it cooks, so don’t stress about making sure every inch is covered right now.
Step 3. Close the lid on your Instant Pot and make sure that little valve on top is turned to the sealing position. This is super important. If it’s on venting, your pot won’t build pressure and nothing will cook properly. I’ve made that mistake exactly once, and let me tell you, waiting 20 minutes only to realize nothing happened is not fun. Set your Instant Pot to Manual mode or Pressure Cook mode, depending on which model you have, and set the timer for 7 minutes at high pressure.
Step 4. When the timer beeps, don’t touch anything for 8 minutes. This is called natural pressure release, and it lets the pressure come down gradually. This step keeps your chicken extra tender and juicy. After those 8 minutes pass, carefully turn the valve to venting to release any remaining pressure. Once the pin drops and it’s safe to open, lift that lid and take in that amazing smell. The chicken should look perfectly cooked and the sauce will be bubbling around it.
Step 5. Use tongs to transfer the chicken to a plate or cutting board. Cover it with some foil to keep it warm while you work on the sauce. This is a good time to check if the chicken is cooked through. It should be white all the way through with no pink spots. If you’ve got a meat thermometer, it should read 165°F in the thickest part. But honestly, with this cooking method, I’ve never had undercooked chicken. The Instant Pot is pretty foolproof that way.
Step 6. Switch your Instant Pot to sauté mode. While it’s heating up, mix your cornstarch and water together in a small bowl until the cornstarch dissolves completely. No lumps allowed here. Pour this slurry into the pot and start stirring. Keep stirring for about 5 minutes as the sauce bubbles and thickens. You’ll see it go from thin and watery to thick and glossy. It’s kind of mesmerizing to watch. When it coats the back of your spoon, you know it’s ready.
Step 7. While the sauce is thickening, grab two forks and shred that chicken. I like to pull it into bite-sized pieces, nothing too small or too big. The shredded chicken will soak up way more sauce than whole breasts would, and every piece gets coated in that delicious honey garlic goodness. If you prefer to keep your chicken breasts whole or slice them, that’s fine too. I just think shredded tastes better.
Step 8. Turn off the Instant Pot and add the shredded chicken back into that beautiful sauce. Use a spoon or spatula to toss everything together until every piece of chicken is covered in sauce. The chicken will absorb some of that liquid, making it even more flavorful. This is the moment when everything comes together and you realize you’ve just made something really delicious in barely any time at all.
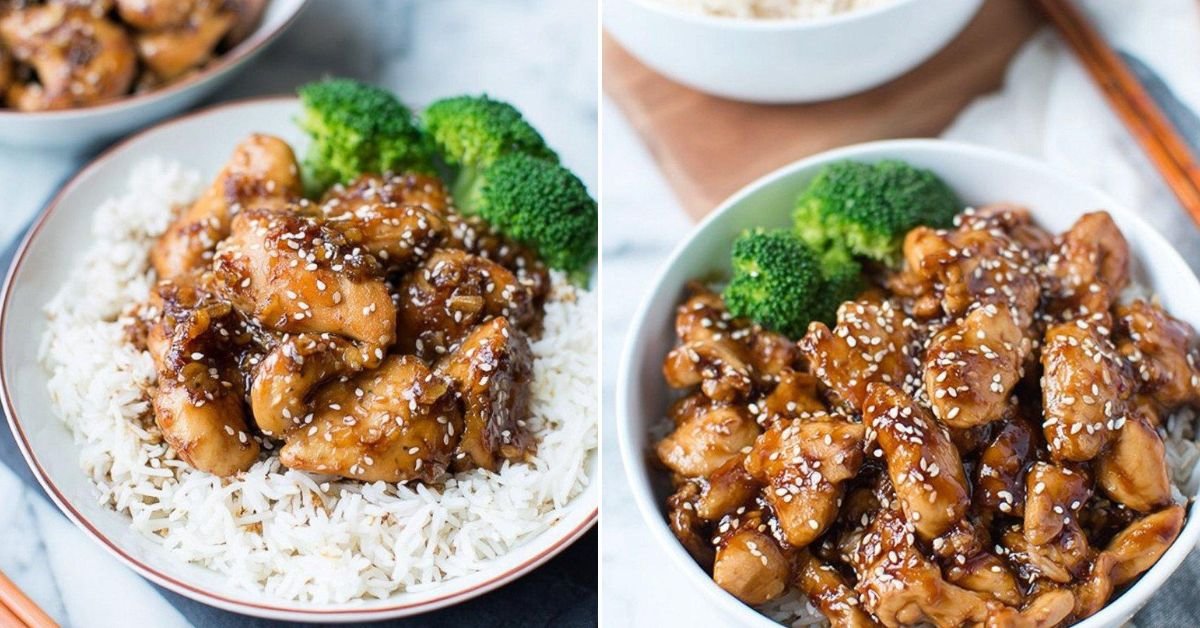
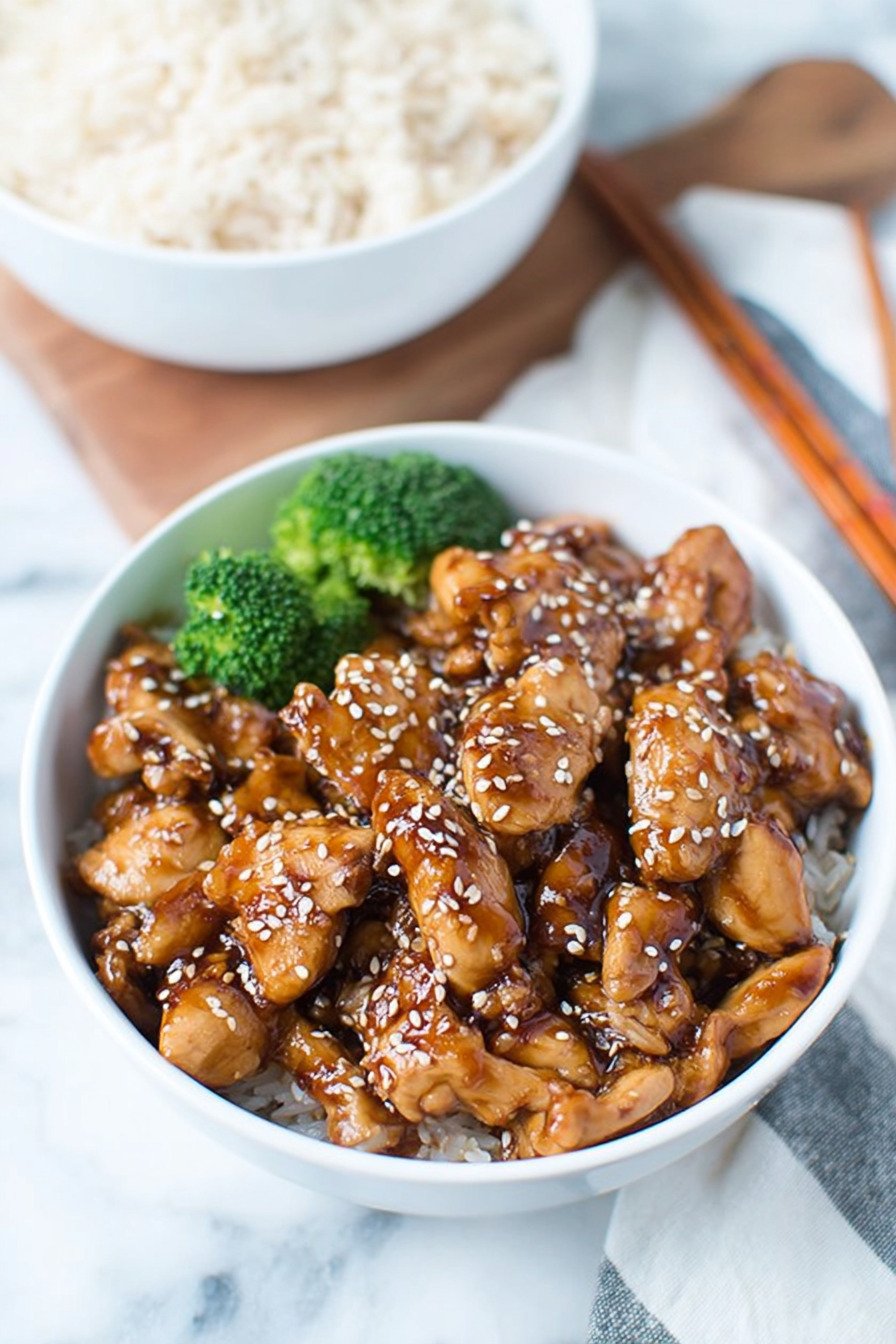
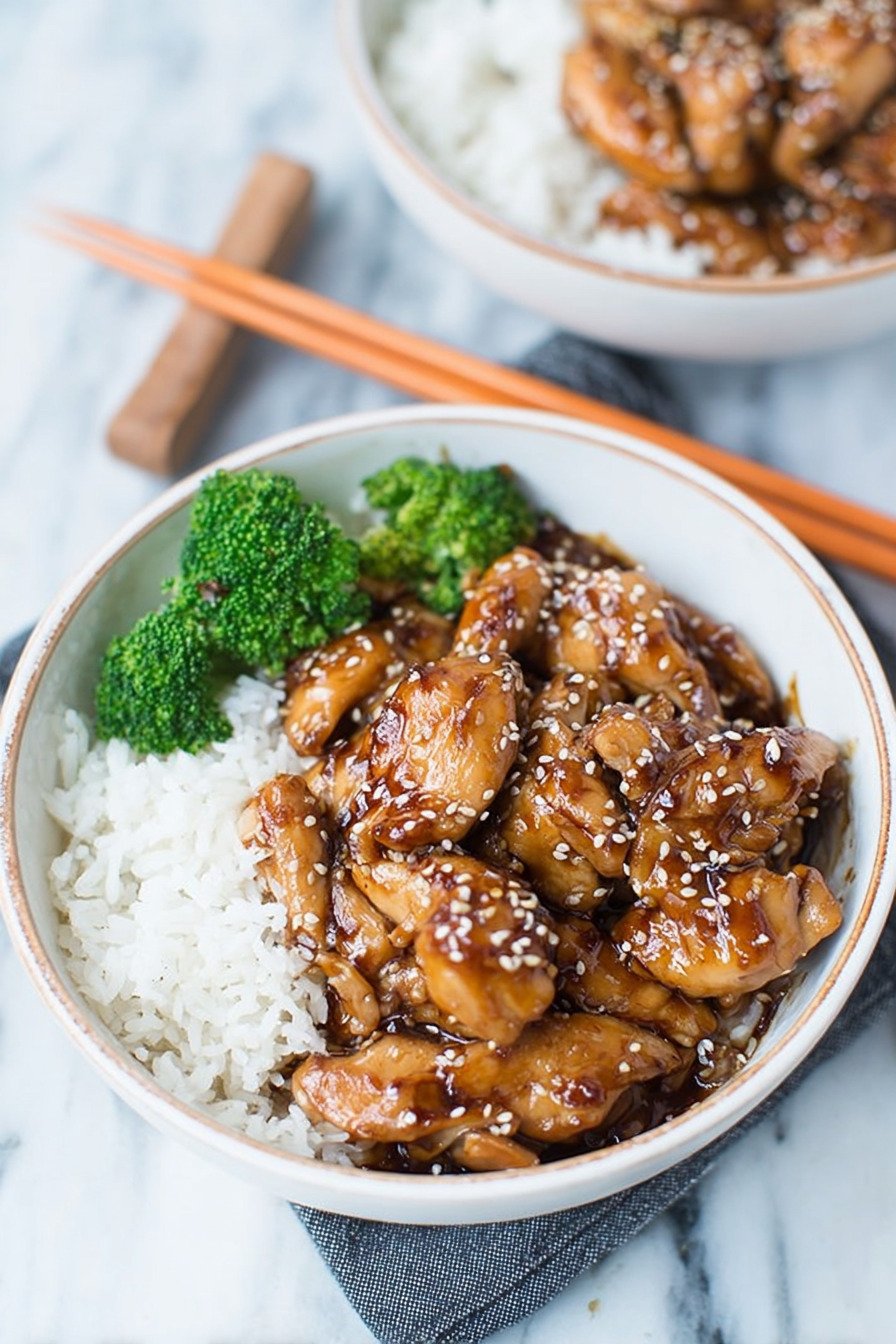
Step 9. Serve it up hot. I usually pile this over white rice, but brown rice or cauliflower rice works great too. Steamed broccoli on the side is my usual move, but green beans, snap peas, or even a simple salad all pair nicely. Whatever vegetables you’ve got hanging out in your fridge will work. The sauce is so good that you might find yourself drizzling it over the veggies too. No judgment here; I do it all the time.
5) Tips for Making Instant Pot Honey Garlic Chicken
Don’t Skip the Natural Release. I know it’s tempting to quick-release all the pressure as soon as the timer beeps, but trust me on this one. Those 8 minutes of natural release make a huge difference in the texture of your chicken. Quick-releasing right away can make the chicken a bit tougher and stringier. The gradual pressure release lets the meat relax and stay tender. It’s like giving your chicken a spa treatment. Those few extra minutes are totally worth it for the end result.
Adjust for Chicken Size. Not all chicken breasts are created equal. If you grabbed a package where each breast is closer to 200 grams or bigger, you might want to add an extra minute to the cooking time. Go with 8 minutes instead of 7. The Instant Pot is forgiving, but massive chicken breasts do need a bit more time to cook through completely. On the other hand, if your breasts are on the smaller side, 7 minutes is perfect. When in doubt, check the internal temperature. You’re looking for 165°F in the thickest part.
Frozen Chicken Works Great. This is one of my favorite things about this recipe. You can cook frozen chicken breasts straight from the freezer. Just skip the chicken stock and bump the cooking time up to 10 minutes with an 8-minute natural release. The frozen chicken releases enough liquid on its own, so you don’t need that extra quarter cup of stock. This has saved my dinner plans more times than I can count when I forgot to thaw anything.
Try Chicken Thighs. If you’re a dark meat person, boneless skinless chicken thighs work beautifully here. They’re a bit more forgiving than breasts and have more flavor on their own. Cook them for 9 to 10 minutes at high pressure with the same natural release. Thighs have a higher fat content, so they stay juicy even if you accidentally overcook them a little. Plus, they’re usually cheaper than breasts, which is always a bonus.
Make the Sauce Thicker or Thinner. Some people like their sauce super thick and others prefer it a bit looser. You control this with the cornstarch slurry. Want it thicker? Add another tablespoon of cornstarch mixed with a tablespoon of water. Want it thinner? Just use one tablespoon of cornstarch instead of two. You can adjust it right there at the end while you’re stirring on sauté mode. Keep tasting and adjusting until it’s exactly how you like it.
Control the Heat Level. That one tablespoon of sriracha gives you a nice gentle heat that most people enjoy. But if you’ve got someone in your family who thinks black pepper is spicy, cut it back to half a tablespoon or leave it out. The sauce is still delicious without any heat at all. And if you’re cooking for spice lovers, go ahead and add more. I’ve gone up to two tablespoons before and it was perfect for my taste. Just remember you can always add more heat, but you can’t take it away once it’s in there.
6) Making Instant Pot Honey Garlic Chicken Ahead of Time
This recipe is perfect for meal prep, and I make it on Sundays all the time. The chicken actually tastes better the next day after the flavors have had time to mingle in the fridge. When I’m planning to eat this later in the week, I cook it exactly as written, let it cool down completely, and then transfer everything to a big airtight container. It’ll keep in the fridge for up to four days, which means you can make it once and eat it multiple times without any extra work.
Here’s a trick I learned after making this a bunch of times. If you know you’re meal prepping, consider storing the chicken and sauce separately from your rice and vegetables. That way, when you reheat it, everything stays at its best texture. The chicken reheats beautifully in the microwave. Just give it a stir halfway through heating so it warms evenly. You can add a splash of water if the sauce seems too thick after being in the fridge. Cold sauce always thickens up more than warm sauce.
If you want to get really organized, you can even prep the ingredients before cooking. Measure out your soy sauce, honey, garlic, ginger, and sriracha into a jar or container. Keep your chicken breasts in a separate bag or container. When you’re ready to cook, just dump everything into the Instant Pot and follow the recipe as written. This works great if you know Monday is going to be crazy but you want a home-cooked meal ready to go. A little planning goes a long way when life gets hectic.
Another option is to freeze the cooked chicken and sauce together. I portion it into individual servings in freezer-safe containers, and it keeps for up to three months. When I want to eat it, I thaw it overnight in the fridge and reheat it the same way I would with refrigerated leftovers. The texture stays surprisingly good. The sauce might separate a tiny bit when frozen, but a quick stir fixes that right up. This is my secret weapon for those weeks when I know I won’t have time to cook at all.
7) Storing Leftover Instant Pot Honey Garlic Chicken
Leftovers are your friend with this recipe. I actually think this tastes even better on day two and three. The chicken soaks up more of that sauce overnight, and everything just gets more flavorful. Store any leftover chicken and sauce together in an airtight container in your fridge. It’ll stay fresh for up to five days, though in my house, it rarely lasts that long. My husband has been known to sneak bowlfuls of this for lunch when I’m not looking.
When you’re ready to reheat, you’ve got options. The microwave is the fastest route. Just put your portion in a microwave-safe bowl, cover it with a damp paper towel to keep it from drying out, and heat it for a minute or two until it’s hot all the way through. Give it a stir halfway through so it heats evenly. If the sauce seems too thick after being refrigerated, add a tiny splash of water or chicken stock and stir it in before heating. That brings the sauce back to its original silky consistency.
You can reheat this on the stovetop too if you prefer. Put it in a small pot over medium-low heat and stir occasionally until it’s warmed through. This method gives you more control over the texture. If you want to add fresh vegetables or turn it into fried rice, the stovetop is definitely the way to go. I’ve tossed leftover honey garlic chicken with fresh stir-fried veggies more times than I can count, and it’s always delicious.
For freezing leftovers, portion them into individual servings in freezer-safe containers or heavy-duty freezer bags. Squeeze out as much air as possible if you’re using bags. Label everything with the date so you remember when you made it. Frozen honey garlic chicken keeps well for up to three months. Thaw it in the fridge overnight before reheating. While the texture might be slightly different from fresh, it’s still way better than takeout and so much cheaper. Having these portions ready to go in your freezer is like having your own personal meal delivery service.
8) Try these Main Course next!


9) Instant Pot Honey Garlic Chicken
Instant Pot Chicken Recipes: Sweet Honey Garlic Chicken in 15 Minutes
Ingredients
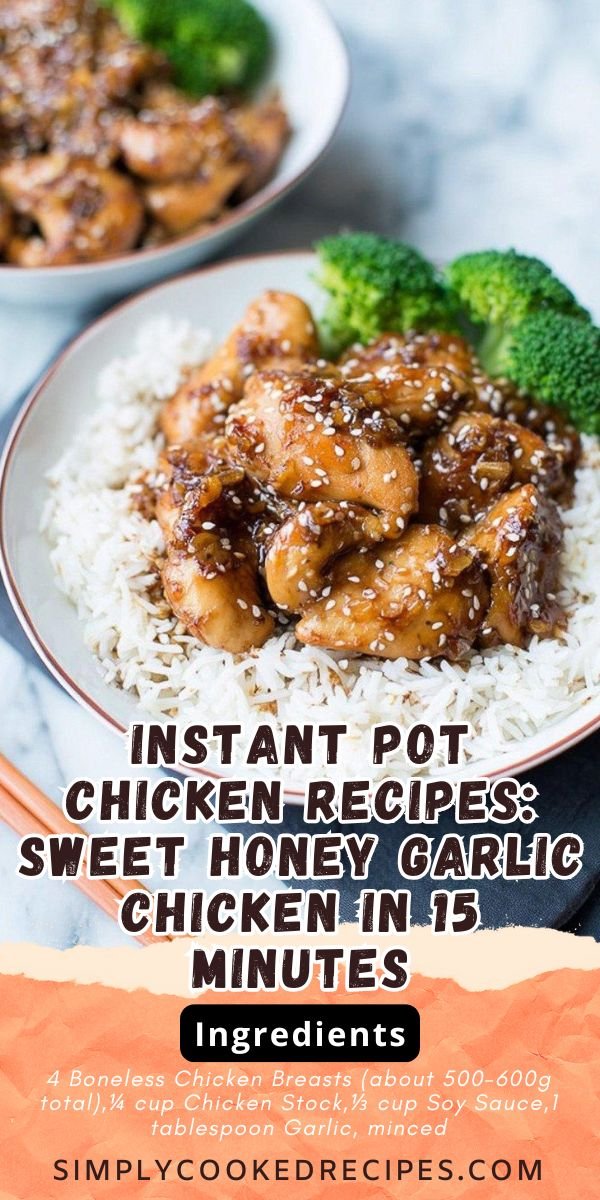
- 4 Boneless Chicken Breasts (about 500-600g total)
- ¼ cup Chicken Stock
- ⅓ cup Soy Sauce
- 1 tablespoon Garlic, minced
- 1 teaspoon Ginger, minced
- ½ cup Honey
- 1 tablespoon Sriracha
- ¼ cup Water
- 2 tablespoons Cornstarch
Instructions
- Place the chicken breasts into your Instant Pot inner pot.
- Pour in the chicken stock, soy sauce, minced garlic, ginger, honey, and sriracha right over the chicken. Give everything a quick stir to combine.
- Close the lid, make sure the valve is set to sealing, and set your Instant Pot to Manual mode for 7 minutes at high pressure.
- When the timer goes off, let the pressure release naturally for 8 minutes. After that, carefully do a quick release for any remaining pressure.
- Open the lid and remove the cooked chicken to a plate. Cover it with foil to keep it warm.
- Turn your Instant Pot to sauté mode. Mix the cornstarch and water together in a small bowl until smooth.
- Pour the cornstarch slurry into the pot and stir constantly. Let it bubble away for about 5 minutes until the sauce thickens up nicely.
- While the sauce is cooking, use two forks to shred the chicken into bite-sized pieces.
- Turn off the Instant Pot. Add the shredded chicken back into that beautiful sauce and toss everything together until well coated.
- Serve hot over rice with your favorite veggies on the side.
10) Nutrition
Serving Size: 1 serving | Calories: 422 | Sugar: 35 g | Sodium: 1453 mg | Fat: 6 g | Saturated Fat: 1 g | Carbohydrates: 41 g | Fiber: 1 g | Protein: 51 g | Cholesterol: 145 mg


Leave a Comment