
Mini quiches have always felt like that little secret you pull out when you want something fancy but don’t feel like putting in a marathon effort. These are bite-sized, flaky, and filled with creamy goodness that makes them vanish faster than you can set them down on the table. I’ve made them for brunch, for holiday spreads, and once, just because I wanted to clear out my fridge. No judgment, right? This recipe is my go-to mini quiche recipe, and trust me, once you make them, you’ll keep finding excuses to whip up another batch. Plus, they’re one of those healthy finger foods that somehow feel indulgent. I mean, how often do you get to pop buttery crust, eggs, cheese, and veggies all in one mouthful? And here’s the fun part—every time I make these, I remember when my cousin asked me how to make pasta recipes, but ended up learning how to make pudding instead. True story. These little quiches spark those kinds of kitchen stories. They’re easy enough for anyone who’s learning how to make cabbage or even how to make tea (because if you can boil water, you’re halfway there). They also fit right into the pages if you’re working on how to make a recipe book of your own. So grab your eggs, your pie crust, and a dash of confidence—we’re making mini quiches today!

Table of Contents
- 1) Key Takeaways
- 2) Easy Basic Mini Quiches Recipe
- 3) Ingredients for Basic Mini Quiches
- 4) How to Make Basic Mini Quiches
- 5) Tips for Making Basic Mini Quiches
- 6) Making Basic Mini Quiches Ahead of Time
- 7) Storing Leftover Basic Mini Quiches
- 8) Try these appetizers next!
- 9) Basic Mini Quiches
- 10) Nutrition
1) Key Takeaways
- Mini quiches are versatile, easy, and always a crowd-pleaser.
- They work well for breakfast, brunch, or even late-night snacks.
- You can switch up fillings based on what you have on hand.
- They store well and can be made ahead of time without stress.
2) Easy Basic Mini Quiches Recipe
Mini quiches fall into that sweet spot of recipes that make you look like a pro without asking you to act like one. I call them the life of the brunch table. They deliver flavor, portability, and variety in one bite. When I first started making these, I thought they were too “fancy” for my skill level, but then I realized all they require is some whisking, a crust, and a hot oven. Easy as pie—or quiche, in this case.
As one of my favorite healthy finger foods, these quiches also check the box for convenience. I love pulling them out of the oven and watching them puff up before they settle into tender, golden bites. They’re light enough for a quick snack but rich enough to hold their own next to bigger dishes. I usually make a dozen, thinking I’ll have leftovers, but they vanish faster than I can plate them.
The fun part? You can adapt them endlessly. Throw in spinach and mushrooms for a veggie boost, or sneak in some sharp cheddar for a flavor kick. It’s a recipe that gives back more than you put into it, and that’s why it stays in my rotation. It feels like a little kitchen win every single time.
3) Ingredients for Basic Mini Quiches
Refrigerated Pie Crusts: The base that saves time and still delivers flaky layers. I roll them out, cut circles, and they fit neatly into muffin cups. No stress, no crumbling.
Eggs: The heart of the filling. Whisked until smooth, they create that custard-like texture that makes each bite soft yet firm enough to hold.
Half-and-Half Cream: Rich, creamy, and responsible for that silky bite. I’ve tried milk before, but cream gives a better finish.
Salt and Pepper: Just the basics, but they balance the flavors and lift the eggs. Without them, quiches taste flat.
Swiss Cheese: Nutty and melty, it anchors the quiche flavor. It pulls everything together into one smooth bite.
Bacon or Ham: Savory and salty, the meat adds that punch of flavor. Sometimes I use leftover cooked bacon, and it works perfectly.
Onion: Chopped fine, it gives little bursts of flavor without overpowering. Cooked or raw, it adds a nice lift.
Green Pepper: Bright and a bit sweet, it pairs well with the cheese and ham, giving each bite freshness.

4) How to Make Basic Mini Quiches
Step 1. Preheat your oven to 375°F. This sets the stage for even baking, so the quiches rise properly and finish golden on top.
Step 2. Roll out your pie crusts and cut small rounds to fit mini muffin tins. Press each one into the greased cups gently but firmly so they hold shape while baking.
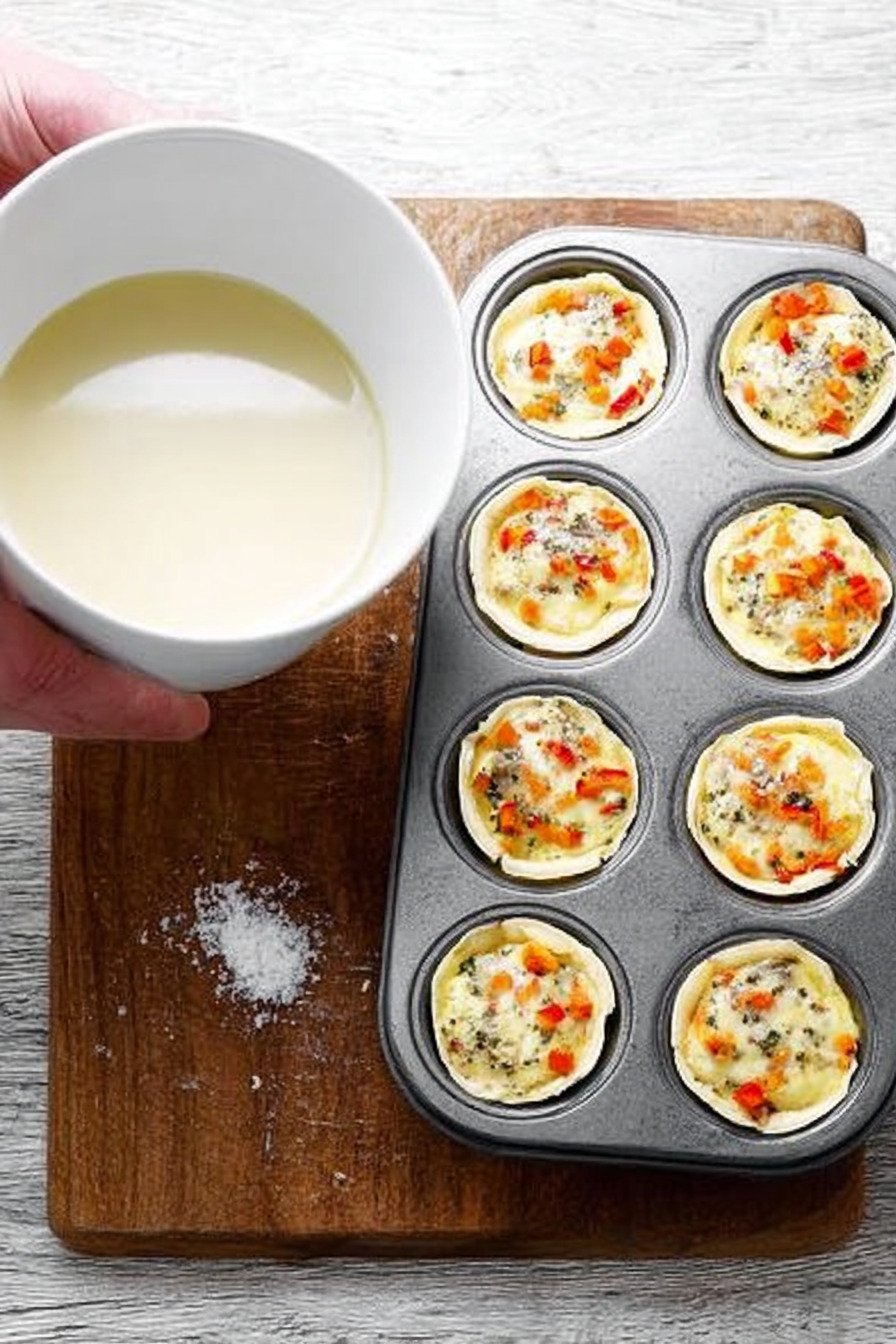
Step 3. In a bowl, whisk eggs, half-and-half, salt, and pepper until smooth. Take your time here. The smoother the mix, the lighter the quiche turns out.
Step 4. Stir in cheese, bacon or ham, onion, and green pepper. At this point, the bowl already smells amazing, and you’ll know you’re on track.
Step 5. Pour filling into crusts, filling each cup about three-quarters full. They puff as they bake, so don’t overdo it.
Step 6. Bake for 20 to 25 minutes until golden brown and the centers are set. I like to check one by gently poking the middle with a toothpick. If it comes out clean, you’re good.
Step 7. Let them cool for 5 minutes, then carefully lift them out. They hold their shape best after a short rest.

5) Tips for Making Basic Mini Quiches
I’ve learned that mini quiches are forgiving, but they reward a little attention. One tip is to whisk the eggs longer than you think you need. It helps them bake lighter. I also like to mix and match fillings. Spinach and feta make them feel fresh, while cheddar and sausage make them hearty. The point is you can experiment without fear.
Don’t skip greasing the muffin tins. Trust me, I tried once, and I ended up with a batch glued to the pan. Not pretty. A light coat of spray or butter saves a lot of frustration. Another small detail is to cool them slightly before removing. That few minutes of patience keeps them intact.
If you’re serving them at a party, make a few varieties. People love options. They’ll pick a favorite, and you’ll hear about it later, which is part of the fun. These little bites bring personality to the table, and that’s what makes them memorable.
6) Making Basic Mini Quiches Ahead of Time
Planning ahead with these quiches feels like a gift to yourself. I often bake them the night before hosting a brunch. In the morning, all I need to do is warm them in the oven. They taste just as good, and I’m free to focus on other dishes or just enjoy coffee with guests.
You can also freeze them. After baking and cooling, I pack them into airtight containers. A quick reheat at 350°F makes them taste fresh again. This trick has saved me more times than I can count when last-minute plans pop up.
Even prepping the crusts and filling separately works. Assemble and bake the next day, and you’ve cut down your work. The recipe fits into busy schedules without stress, which is one reason I keep coming back to it.
7) Storing Leftover Basic Mini Quiches
Leftovers don’t happen often with these, but when they do, I’m glad they keep well. I store them in the fridge, covered, and they last up to four days. They reheat in the oven better than in the microwave, where they can turn rubbery. A few minutes at 325°F brings them back to life.
If I freeze them, I wrap each one in plastic and place them in a freezer bag. That way, I can take out just what I need. They warm up in the oven directly from frozen, which makes them a convenient snack or breakfast option.
The truth is, they don’t stay around long enough for storage to matter much. But knowing they hold up means I can double a batch without worry. It feels good to know something so small can stretch so far.
8) Try these appetizers next!
9) Basic Mini Quiches

Healthy Finger Foods Mini Quiche Recipe
Ingredients
- 1 package refrigerated pie crusts (14 ounces), softened according to package directions
- 6 large eggs
- 1 1/2 cups half-and-half cream
- 1/4 teaspoon salt
- 1/4 teaspoon pepper
- 1 cup shredded Swiss cheese
- 1/2 cup cooked bacon or diced ham
- 2 tablespoons chopped onion
- 2 tablespoons chopped green pepper
Instructions
- Preheat oven to 375°F (190°C).
- On a lightly floured surface, roll out the pie crusts and cut into small rounds to fit mini muffin tins.
- Press each round into a greased mini muffin cup.
- In a large bowl, whisk together eggs, half-and-half, salt, and pepper until smooth.
- Stir in cheese, bacon or ham, onion, and green pepper.
- Pour filling evenly into crusts, filling about 3/4 full.
- Bake 20–25 minutes or until golden brown and set in the center.
- Cool for 5 minutes before carefully removing from pans. Serve warm or at room temperature.
10) Nutrition
Serving Size: 1 mini quiche | Calories: 120 | Fat: 8 g | Saturated Fat: 3 g | Carbohydrates: 7 g | Fiber: 0.5 g | Protein: 5 g | Cholesterol: 55 mg | Sodium: 160 mg


Leave a Comment