I’ll never forget my first batch of sourdough bagels. After baking nothing but loaves for what felt like forever, I figured it was time to mix things up. That first bite? Game over. We’re talking a golden crust that gives way to this soft, airy center that just melts in your mouth. My family went absolutely wild for them, and honestly, we haven’t bought bagels from the store since. Let me tell you what I love most about this bagel recipe. It’s ridiculously simple. You’ve got five ingredients and a schedule that works around your life, not the other way around. The best bagel recipe homemade shouldn’t stress you out, and this one doesn’t. Plus, it’s crazy versatile. Want everything seasoning? Go for it. Feeling fancy with some cheddar? Absolutely. This is hands down one of the best sourdough discard recipes I’ve tried too. When you pull these babies out of the oven and slather on some butter while they’re still warm, you’ll get it. That chewy bite, that slight tang from the starter, the way your kitchen smells like a real bakery. Whether you’re craving a simple bagel recipe for breakfast sandwiches or dreaming up blueberry bagel recipe ideas for brunch, you’re covered. Trust me on this. Your bagel recipe ideas just got a whole lot better.
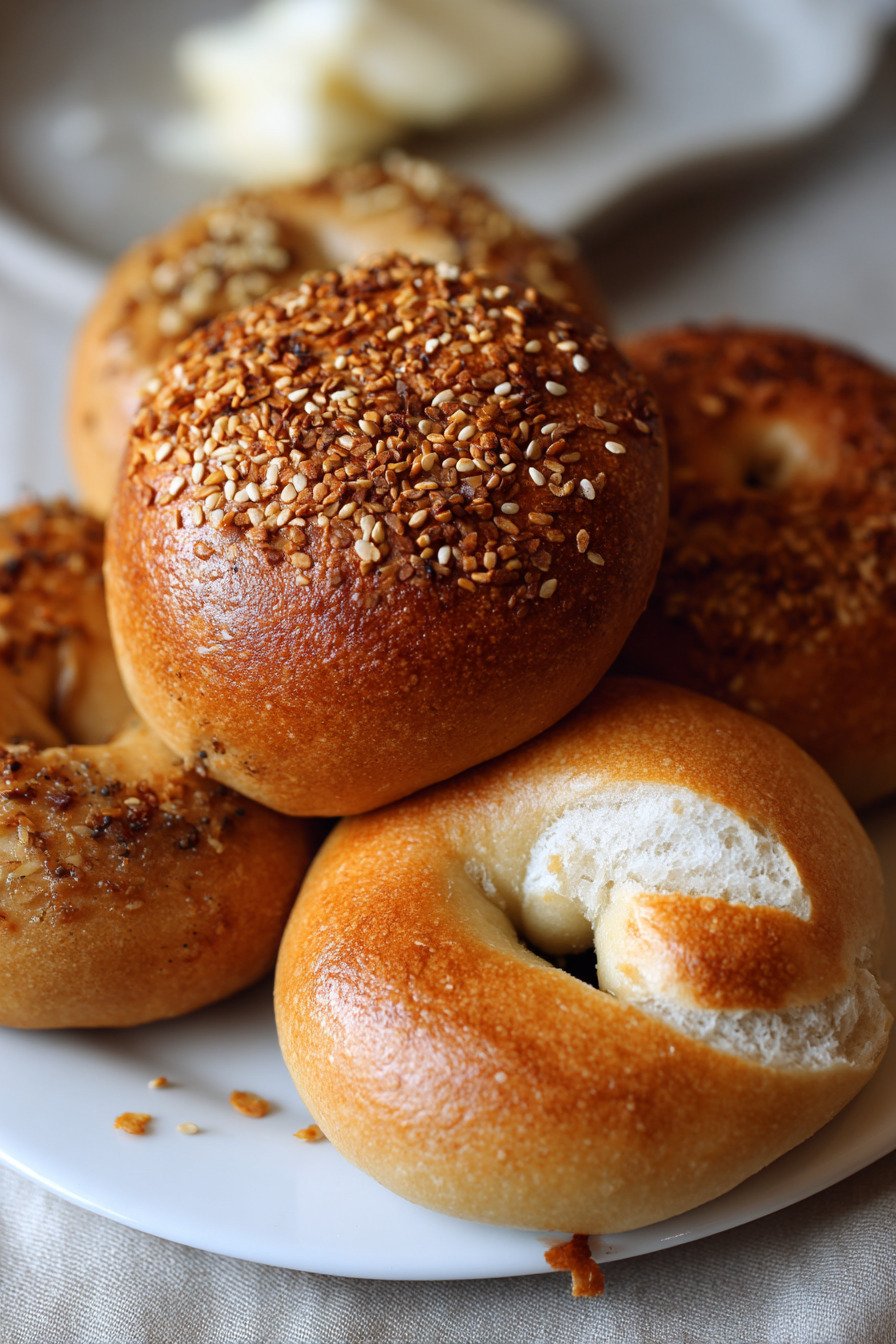
Table of Contents
- 1) Key Takeaways
- 2) Easy Sourdough Bagels Recipe
- 3) Ingredients for Sourdough Bagels
- 4) How to Make Sourdough Bagels
- 5) Tips for Making Sourdough Bagels
- 6) Making Sourdough Bagels Ahead of Time
- 7) Storing Leftover Sourdough Bagels
- 8) Try these Breakfast recipes next!
- 9) Sourdough Bagels
- 10) Nutrition
1) Key Takeaways
- What makes sourdough bagels different from regular bagels?
- Can I use sourdough discard for this bagel recipe?
- Why do you have to boil bagels before baking them?
- How long does it take to make homemade sourdough bagels?
- What are the best toppings for homemade bagels?
2) Easy Sourdough Bagels Recipe
Listen, I’m gonna be honest with you. The first time I made this bagel recipe, I wasn’t expecting much. I’d been baking sourdough bread for months, and bagels felt like this intimidating leap I wasn’t ready for. Boy, was I wrong. These turned out so ridiculously good that my husband actually stopped mid bite and gave me that look. You know the one. The “where have these been all my life” look.
What makes this the best bagel recipe is how insanely simple it is. We’re talking five ingredients. That’s it. No fancy equipment, no complicated techniques, just straightforward baking that fits into your real life. I usually start the dough at night, let it do its thing while I sleep, and by morning I’m pulling golden, chewy bagels out of the oven. The whole house smells like a legit bagel shop, and trust me, your neighbors will be jealous.
Here’s the thing about the best bagel recipe homemade. It doesn’t just taste better than store bought stuff. It actually IS better. You control what goes into them. No weird preservatives, no mystery ingredients. Just flour, water, starter, a touch of sugar, and salt. The sourdough starter gives them this subtle tang that regular yeast bagels just can’t match. Plus, this works as one of those best sourdough discard recipes if you’ve got extra starter hanging around.
Whether you’re looking for a simple bagel recipe for busy mornings or experimenting with bagel recipe ideas for weekend brunch, this one covers all the bases. I’ve topped these with everything seasoning, loaded them with cheese, even tried a blueberry bagel recipe variation that disappeared in like two seconds. The versatility alone makes this worth keeping in your regular rotation. Once you nail this down, you’ll find yourself making bagels way more often than you ever thought possible.
3) Ingredients for Sourdough Bagels
Active Sourdough Starter
Your starter needs to be bubbly and active for this to work right. I’m talking doubled in size, full of air pockets, ready to party. Feed your starter about 4 to 6 hours before you plan to mix the dough. Mine usually peaks around the 5 hour mark. If your starter is sluggish or hasn’t been fed in a while, give it a couple feeding cycles first. A strong starter is what gives these bagels their rise and that signature tangy flavor we’re after.
Warm Water
Warm, not hot. Think bathwater temperature. Too hot and you’ll kill your starter. Too cold and everything moves at a snail’s pace. I usually just run my tap until it feels comfortably warm on my wrist. Nothing fancy. The water helps dissolve the sugar and creates that initial milky mixture that brings the whole dough together. Some people get super precise with thermometers, but I’ve never bothered and my bagels turn out great every time.
Bread Flour
You really want bread flour for this bagel recipe. Not all purpose. Bread flour has more protein, which means more gluten development, which means chewier bagels. That’s what we’re going for. The higher protein content lets the dough stretch and hold its shape during that boiling step. I’ve tried making these with all purpose flour when I ran out of bread flour once, and they were fine but noticeably less chewy. If you want that authentic bagel texture, spring for the bread flour. Your jaw will thank you.
Sugar
Just regular white sugar works perfectly here. It adds a hint of sweetness to balance out the tang from the sourdough starter. It helps with browning too. When those bagels hit the oven, the sugar caramelizes slightly on the surface, giving you that beautiful golden color. Some people sub in honey or coconut sugar, and that works fine. I stick with white sugar because it’s always in my pantry and it does exactly what I need it to do.
Salt
Salt is not negotiable. It brings out all the flavors and keeps the dough from tasting flat. I use regular kosher salt, nothing fancy. Some folks swear by sea salt or pink Himalayan salt, and if that’s your thing, go for it. The amount here is just right to season the bagels without making them taste salty. It strengthens the gluten structure too, which helps during kneading. Never skip the salt. Your bagels will taste like cardboard without it.
Honey for the Boil Bath
This little trick is what gives the crust that perfect chewy texture and gorgeous shine. The honey goes into the boiling water, not the dough itself. When you drop the bagels in, the honey coats them and helps create that classic bagel exterior we all love. You can substitute brown sugar or maple syrup if you’re out of honey. I’ve tried all three and they all work. The honey version comes out slightly shinier, but honestly, all of them taste fantastic.
4) How to Make Sourdough Bagels
Step 1. Grab a large bowl and mix your active starter, warm water, and sugar together by hand until it looks like cloudy milk. I use my fingers for this part. It takes maybe 30 seconds. Some people use a dough whisk, and that’s cool too, but your hands work just fine. Once everything is combined and the sugar has dissolved, you’re ready to add the dry ingredients.
Step 2. Dump in the bread flour and salt. Mix it all together until you can’t see any dry flour anymore. The dough will look shaggy and rough at this point. That’s normal. Don’t panic. You’re about to knead it into submission. This is where a lot of people get nervous, but trust me, it’s easier than you think.
Step 3. Time to knead. Keep the dough right in the bowl to save yourself some cleanup. Pull a chunk of dough from one side, fold it over the top, and push down with the heel of your hand. Turn the bowl a quarter turn and repeat. Do this for about 5 to 6 minutes. Your dough will go from looking bumpy and stiff to smooth and cohesive. Yes, it’s a bit of an arm workout, but nothing crazy. Put on some music and zone out for a few minutes.
Step 4. Cover the bowl with a damp towel or plastic wrap and let it rest for an hour. The dough relaxes during this time, making it easier to work with later. When you come back, knead it again for just 30 seconds using that same fold and push motion. You’ll notice the dough feels less stiff now and way smoother. Cover it back up and find a warm spot in your kitchen for it to rise.
Step 5. Let the dough bulk ferment until it doubles in size. In my 69 degree kitchen, this takes about 8 to 12 hours. If your kitchen is warmer, it’ll be faster. Colder, slower. I usually start this whole process around 8 or 9 at night, let it sit overnight, and by morning it’s ready to go. Check on it after 8 hours. If it’s not quite doubled yet, give it more time. When it’s ready, the dough will look puffy and feel lighter when you lift the bowl.
Step 6. Turn the dough out onto your counter. No flour needed. Stretch it into a rectangle about half an inch thick. Take a bench scraper or a sharp knife and cut it into 8 equal triangles, like you’re cutting a pizza. If you’re a perfectionist, you can weigh each piece to make sure they’re all around 115 grams. I eyeball it most of the time and they turn out fine.
Step 7. Shape each triangle into a ball. Pull the corners into the center and roll it around on the counter until it’s smooth. Then poke your thumb right through the middle and stretch the hole to about 2 inches across. The dough will shrink back a bit, so make it bigger than you think it needs to be. Place each shaped bagel on a parchment lined baking sheet.
Step 8. Cover the shaped bagels with a damp towel and let them puff up for about 20 to 60 minutes. They won’t double in size like bread, but they should look noticeably puffier and feel lighter. If you press one gently with your finger, it should spring back slowly. That’s when you know they’re ready.
Step 9. Get a big pot of water boiling. Crank your oven to 425 degrees while you’re at it. Whisk the honey into the boiling water until it dissolves completely. Set up a cooling rack on top of a kitchen towel next to your stove. This is where the boiled bagels will go.
Step 10. Drop 2 or 3 bagels at a time into the boiling water. Let them go for 30 seconds on each side. Use a slotted spoon to flip them and then scoop them out. Place them on the cooling rack. The bagels will puff up slightly in the water and get this beautiful glossy coating. Repeat until all the bagels are boiled.
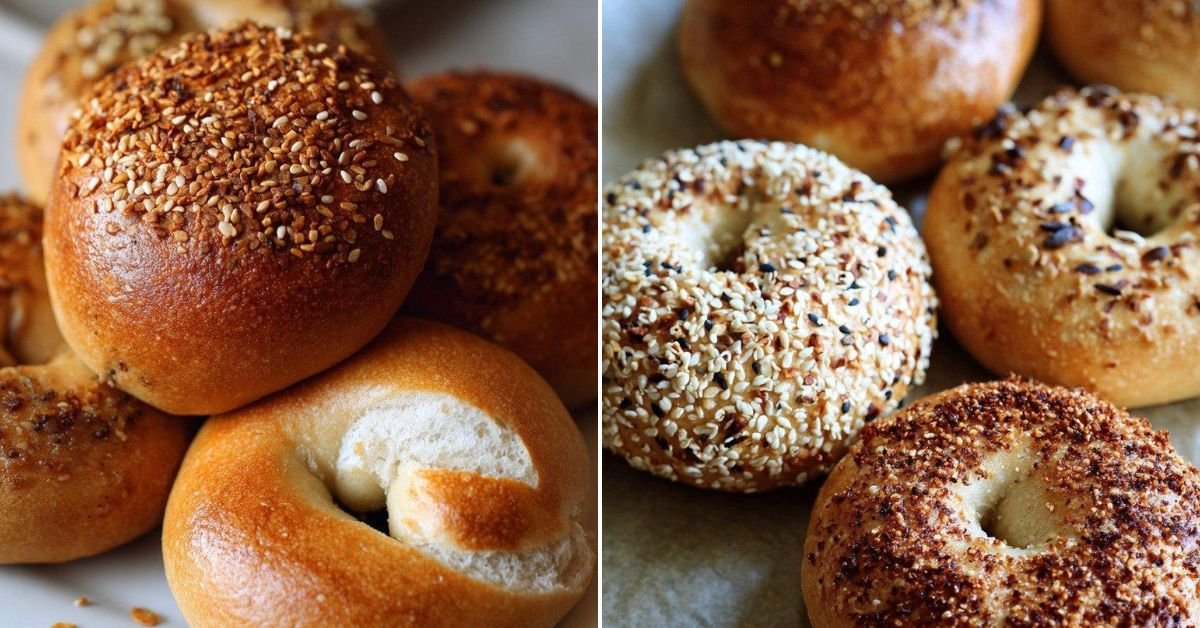
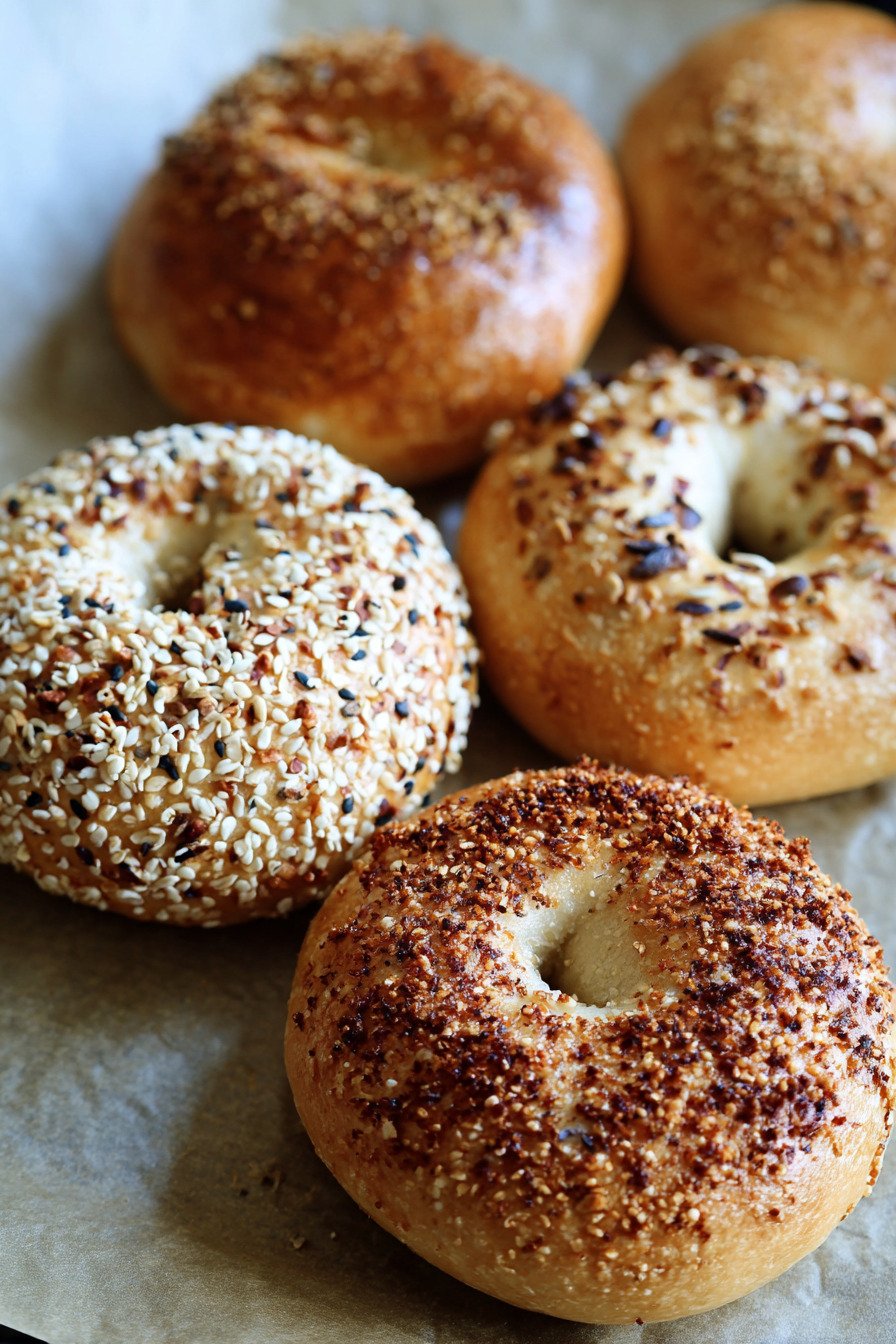
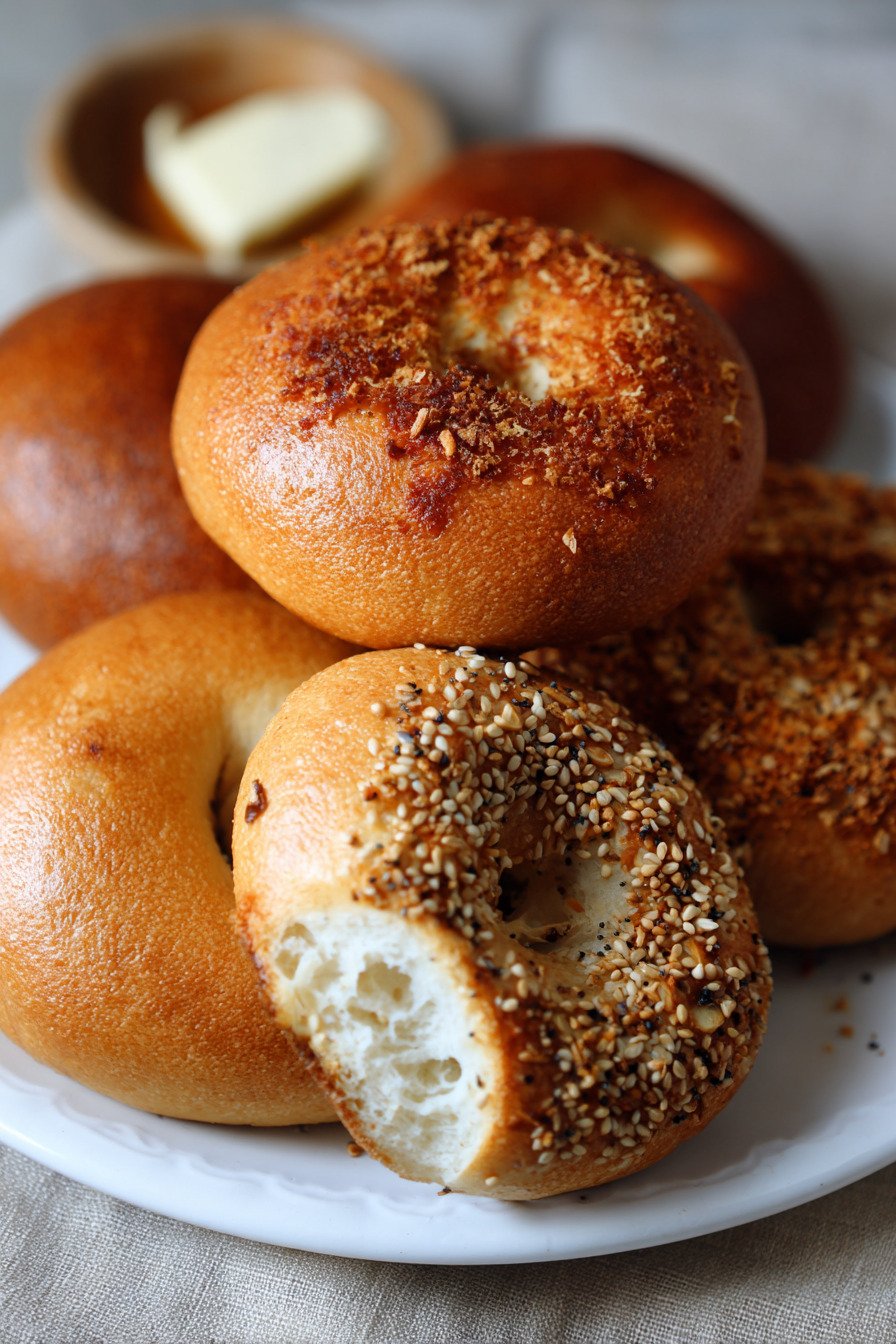
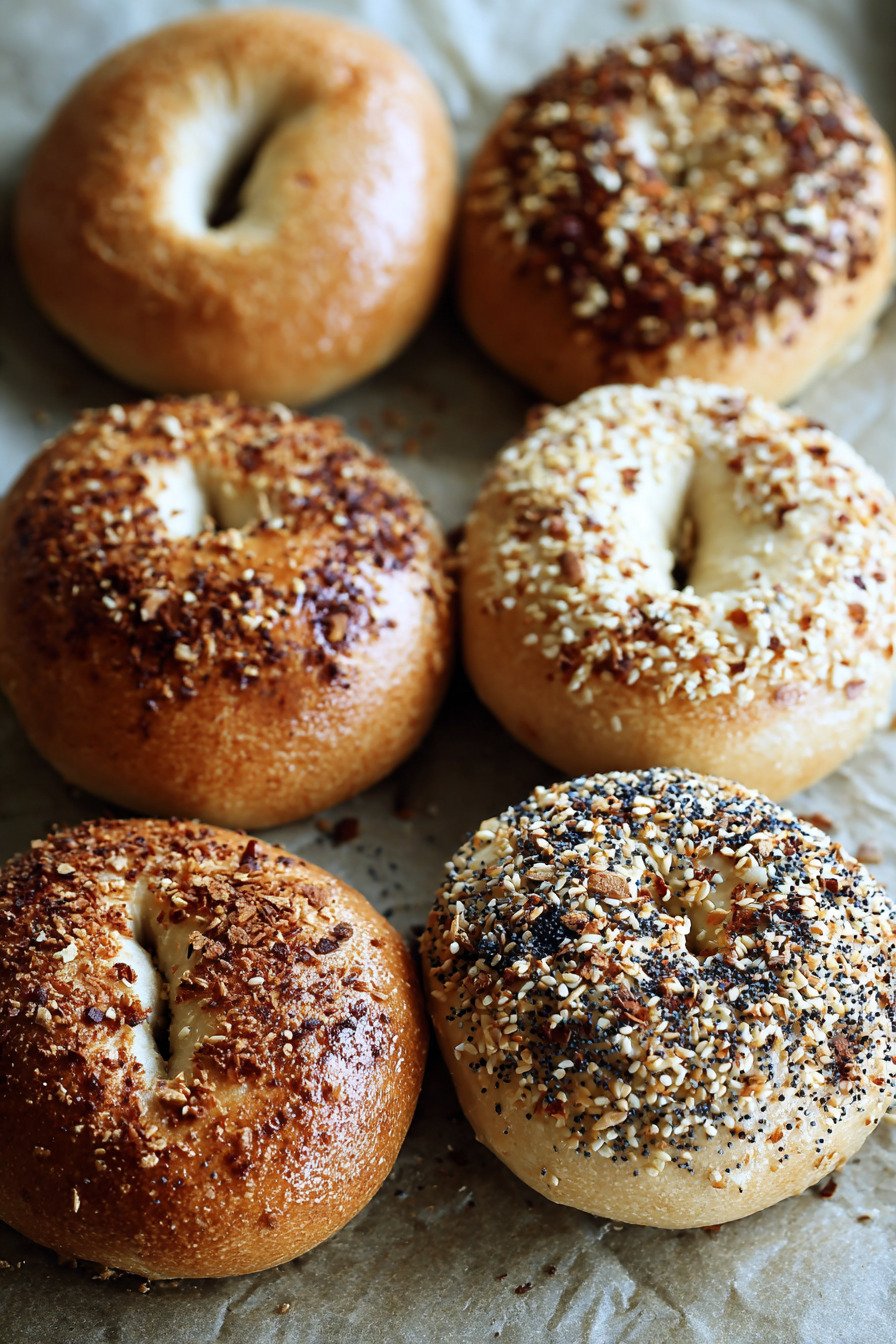
Step 11. If you’re doing toppings, now’s the time. Sprinkle whatever you want on a small plate and press the top of each bagel into it. The sticky surface from the boil bath makes everything stick perfectly. For cheese, hit the bottom too. You’ll get this amazing crispy cheese crust that’s absolutely incredible.
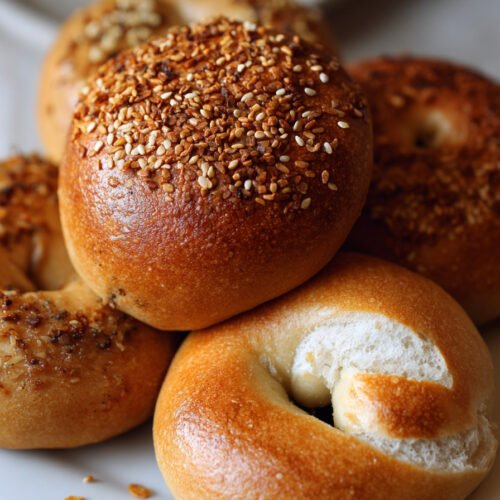
Step 12. Slide the bagels into the oven and bake for 20 to 25 minutes. They should come out golden brown and smell absolutely amazing. Pull them out and let them cool on a wire rack for a few minutes. Or don’t wait. Slice one open while it’s still warm, slap some butter on it, and enjoy the fruits of your labor. You’ve earned it.
5) Tips for Making Sourdough Bagels
Get your measurements right. This is one recipe where I really do recommend using a kitchen scale. Bagel dough is low hydration, meaning it’s pretty stiff and dry compared to bread dough. If your measurements are off by even a little bit, you’ll end up with dough that’s either too sticky or too dry. A scale takes like two seconds to use and makes everything more consistent. You can find decent ones for under twenty bucks. Totally worth it.
Don’t skip the kneading. I know, I know. Hand kneading feels old school and kind of tedious. But here’s the deal. I’ve tried making these in a stand mixer, and they never come out as good. Something about kneading by hand develops the gluten in just the right way. The texture ends up softer and chewier. It only takes 5 minutes. Put on a podcast or some music and power through it. Your bagels will be so much better for it.
Watch your bulk fermentation closely. This is where a lot of people mess up. If you let the dough rise too long, it gets super sticky and loses its shape when you try to work with it. If you don’t let it rise enough, your bagels will be dense and flat. The key is to shape them as soon as the dough doubles in size. Check on it every hour or so after the 8 hour mark. Every kitchen is different, so your timing might vary from mine.
Make the hole bigger than you think. When I first started making bagels, I’d poke this tiny little hole and think I was done. Wrong. The hole shrinks during the second rise and again during baking. By the time they came out of the oven, the holes were basically closed up. Stretch that hole to at least 2 inches across. It’ll look weirdly big, but trust the process. You want a visible hole in your finished bagel, not a roll with a dimple.
Don’t panic if the dough feels stiff. This is supposed to be a stiff dough. Bagels aren’t like bread. They need that low hydration to get the right texture. When you first mix everything together, you might think you did something wrong because the dough seems so dry and tough. You didn’t. Just keep kneading. It’ll come together and smooth out. If it’s genuinely so dry that flour is falling off in chunks, add a tiny splash of water. But usually, it’s fine as is.
Temperature matters more than you think. My kitchen hovers around 68 to 70 degrees most of the year, and that’s perfect for sourdough. If your kitchen is colder, everything will take longer. If it’s warmer, things speed up. In the summer, I sometimes stick my dough in the fridge for part of the bulk ferment to slow it down. In winter, I’ll turn on the oven light and let the bowl sit nearby to stay warm. Pay attention to your environment and adjust accordingly.
6) Making Sourdough Bagels Ahead of Time
Bagels and meal prep go together like peanut butter and jelly. Seriously, this recipe is perfect if you want to get ahead of your week. The beauty of sourdough is that you can slow things down or speed them up depending on what works for your schedule. I’ve played around with timing a bunch of different ways, and they all work great. The key is knowing when to pause the process.
After the bulk fermentation is done and your dough has doubled, you can shape the bagels and stick them straight in the fridge. Cover them well with plastic wrap so they don’t dry out. They’ll keep in there for up to 24 hours no problem. When you’re ready to bake, pull them out and let them warm up and puff slightly at room temperature. This usually takes about 30 to 45 minutes depending on how cold your fridge is. Then boil and bake as usual.
Another option is to mix and knead the dough, do that first hour rest, and then pop the whole bowl in the fridge overnight. The cold slows down the fermentation but doesn’t stop it completely. Pull it out in the morning, let it come to room temperature for a bit, and it’ll finish rising on the counter. This gives you more flexibility if you’re not sure exactly when you’ll have time to shape and bake.
You can even freeze shaped bagels before boiling them. Shape them, freeze them on a baking sheet until solid, then transfer to a freezer bag. When you want fresh bagels, pull out however many you need, let them thaw and puff up on the counter for an hour or two, then boil and bake. The rise takes longer from frozen, but the end result is basically identical to fresh. This is clutch if you want to always have bagels ready to go.
7) Storing Leftover Sourdough Bagels
Fresh bagels are always best, but let’s be real. Sometimes you make a full batch and can’t eat them all in one day. Good news is these keep really well if you store them right. At room temperature in a plastic bag, they’ll stay good for about 2 to 3 days. Don’t put them in the fridge. That actually makes them go stale faster. Just keep them on the counter in a sealed bag or airtight container.
Freezing is where it’s at for longer storage. Once the bagels are completely cool, slice them in half and stick them in a freezer bag. Slicing before freezing means you can pop them straight into the toaster from frozen. No waiting for them to thaw. They’ll keep in the freezer for up to 3 months. I always have a stash in there for quick breakfasts or last minute sandwich cravings.
When you’re ready to eat a frozen bagel, you’ve got options. The toaster is the fastest method. Just toast it straight from frozen on a medium setting. It might take an extra minute compared to fresh, but it comes out perfect. If you want to warm the whole thing without toasting, wrap it in a damp paper towel and microwave it for about 20 seconds. Then finish it in a 350 degree oven for a few minutes to crisp up the outside. Tastes like you just baked it.
Day old bagels are perfect for making bagel chips, which is one of my favorite ways to use up extras. Slice them thin, toss with olive oil and seasoning, and bake until crispy. They’re addictive as a snack or for dipping. You can turn them into breadcrumbs too. Just pulse them in a food processor and store in the freezer. Nothing goes to waste and you always have something delicious ready to eat.
8) Try these Breakfast recipes next!
9) Sourdough Bagels
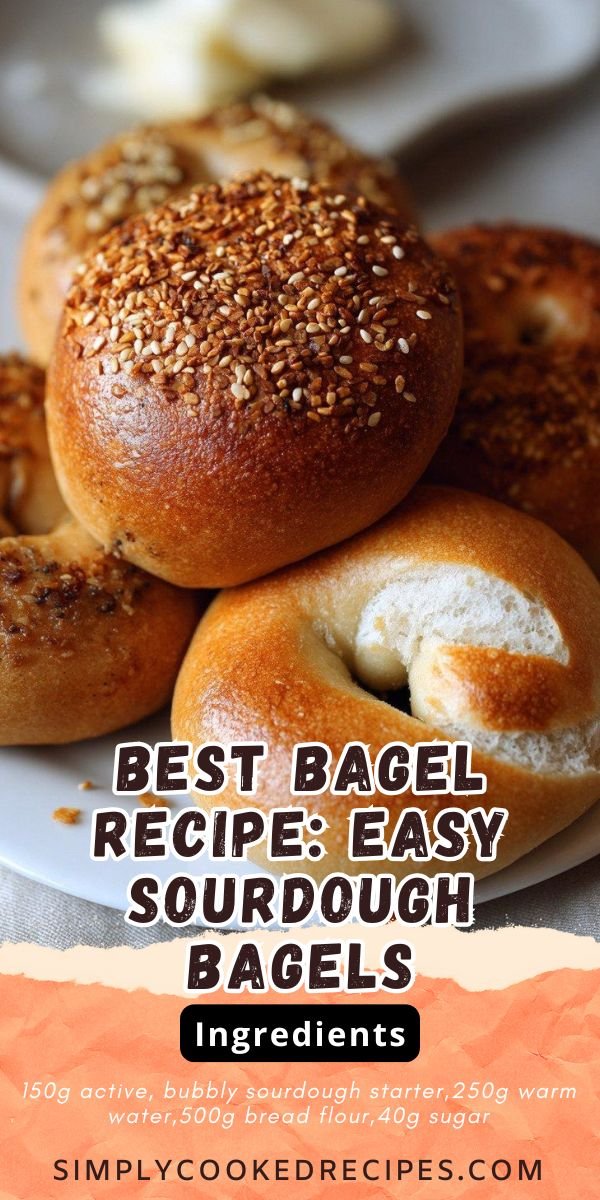
Best Bagel Recipe: Easy Sourdough Bagels
Ingredients
- 150g active, bubbly sourdough starter
- 250g warm water
- 500g bread flour
- 40g sugar
- 11g salt
- 20g honey (for the boil bath)
Instructions
- Mix 150g active starter, 250g warm water, and 40g sugar in a large bowl by hand until it looks like milky liquid.
- Add 500g bread flour and 11g salt. Mix until fully combined.
- Knead the dough for 5 to 6 minutes. Pull a section of dough up, fold it over, and push down with your heel. Turn the bowl and repeat. The dough will get stiff and bumpy, that’s normal.
- Cover and let rest for 60 minutes.
- After the hour, knead again for 30 seconds using the same folding motion. The dough should feel smoother now.
- Cover the bowl and place in a warm spot to rise until at least doubled, about 8 to 12 hours in a 69 degree kitchen. Warmer kitchens will be faster, cooler will be slower.
- Gently remove dough from bowl and stretch into a rectangle about half an inch high on your work surface. No flour needed.
- Cut dough into 8 equal triangle pieces using a bench scraper or knife. Each piece should weigh about 115g if you want to be precise.
- Take one piece and pull the corners toward the center. Roll into a smooth ball. Repeat with remaining pieces.
- Poke your thumb through the center of each ball and stretch to about 2 inches wide. The hole will shrink back a bit.
- Place shaped bagels on a parchment lined baking sheet and cover with a damp tea towel.
- Let them puff up in a warm place, about 20 to 60 minutes.
- Preheat oven to 425 degrees while bagels are rising.
- Fill a large pot with water, add 20g honey, and whisk. Bring to a boil.
- Set up a station with a kitchen towel and cooling rack for easy cleanup.
- Drop 2 to 3 bagels into boiling water and boil for 30 seconds on each side.
- Remove with a slotted spoon and place on the cooling rack. Repeat with remaining bagels.
- Sprinkle toppings on a small plate and dip the top of each boiled bagel. The sticky surface will help toppings stick. For cheese toppings, dip the bottom too for a crunchy bite.
- Bake for 20 to 25 minutes until golden brown.
- Remove from oven and let cool on a wire rack.
- Slice one open while still warm and spread butter on top. Enjoy that chewy, buttery perfection.
10) Nutrition
Serving Size: 1 bagel | Calories: 256 | Sugar: 5.2 g | Sodium: 293 mg | Fat: 0.9 g | Saturated Fat: 0.1 g | Carbohydrates: 54 g | Fiber: 2.1 g | Protein: 8.4 g | Cholesterol: 0 mg


Leave a Comment