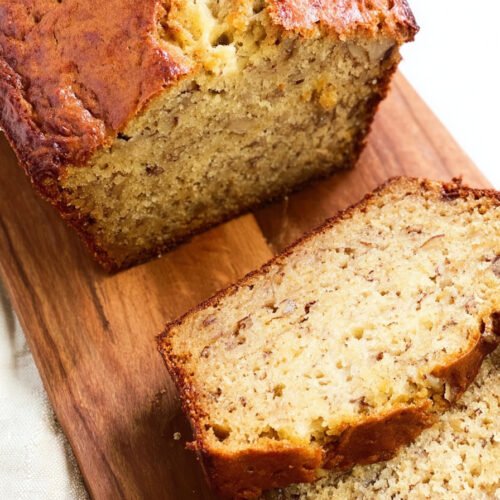
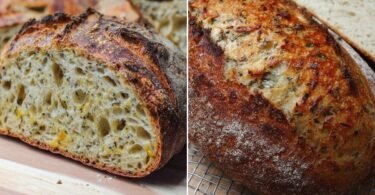
I’m telling you right now, this banana bread recipe is the one you’ve been looking for. You know those overripe bananas sitting on your counter, getting browner by the minute? Yeah, those are about to become your new favorite treat. This isn’t just another 3 ingredient banana bread recipe floating around the internet. It’s got actual flavor, real butter (none of that oil nonsense), and a texture that’ll make you wonder why you ever bothered with store bought. What makes this different from every other 4 banana bread recipe easy you’ll find? Well, for starters, we’re using brown sugar instead of white. Game changer. And melted butter? That’s the secret nobody talks about. Plus, it’s genuinely a one bowl situation. I mean it. No mixer required, no fancy equipment, just you, a bowl, and a fork for mashing those bananas. This best homemade bread comes together in about 10 minutes of actual work. The hardest part is waiting while it bakes and your kitchen fills up with that smell. You can even swap in coconut flour if that’s your thing (check my notes for that). Whether you’re new to baking bread recipes or you’ve made a thousand loaves, this 3 banana bread recipe delivers every single time. Trust me on this one.
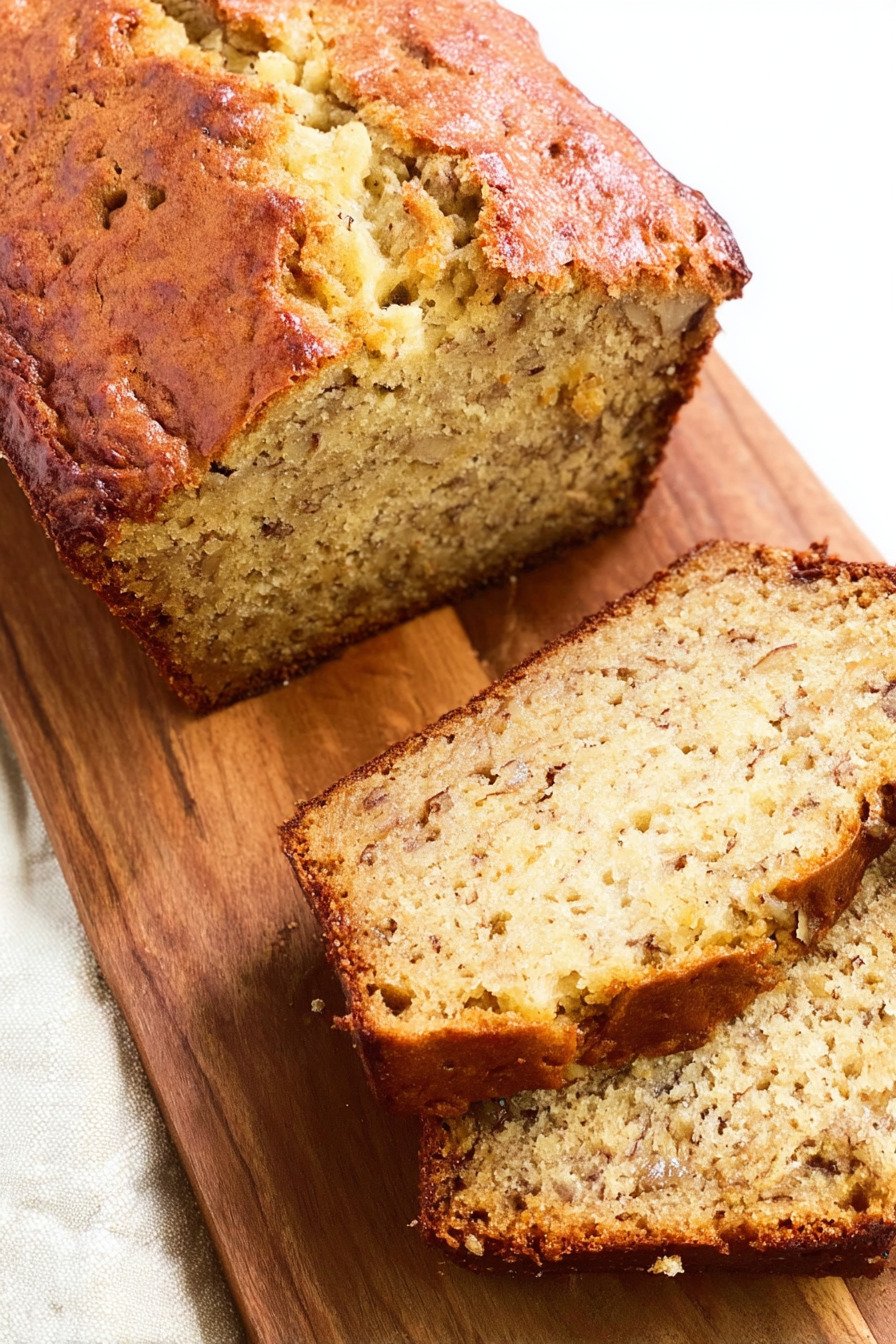
Table of Contents
- 1) Key Takeaways
- 2) Easy Banana Bread Recipe
- 3) Ingredients for Banana Bread
- 4) How to Make Banana Bread
- 5) Tips for Making Banana Bread
- 6) Making Banana Bread Ahead of Time
- 7) Storing Leftover Banana Bread
- 8) Try these Desserts next!
- 9) Banana Bread Recipe
- 10) Nutrition
1) Key Takeaways
- What makes this banana bread recipe so moist and flavorful?
- Can you really make this in just one bowl?
- What’s the secret to getting that perfect texture every time?
- How do you know when your banana bread is actually done baking?

2) Easy Banana Bread Recipe
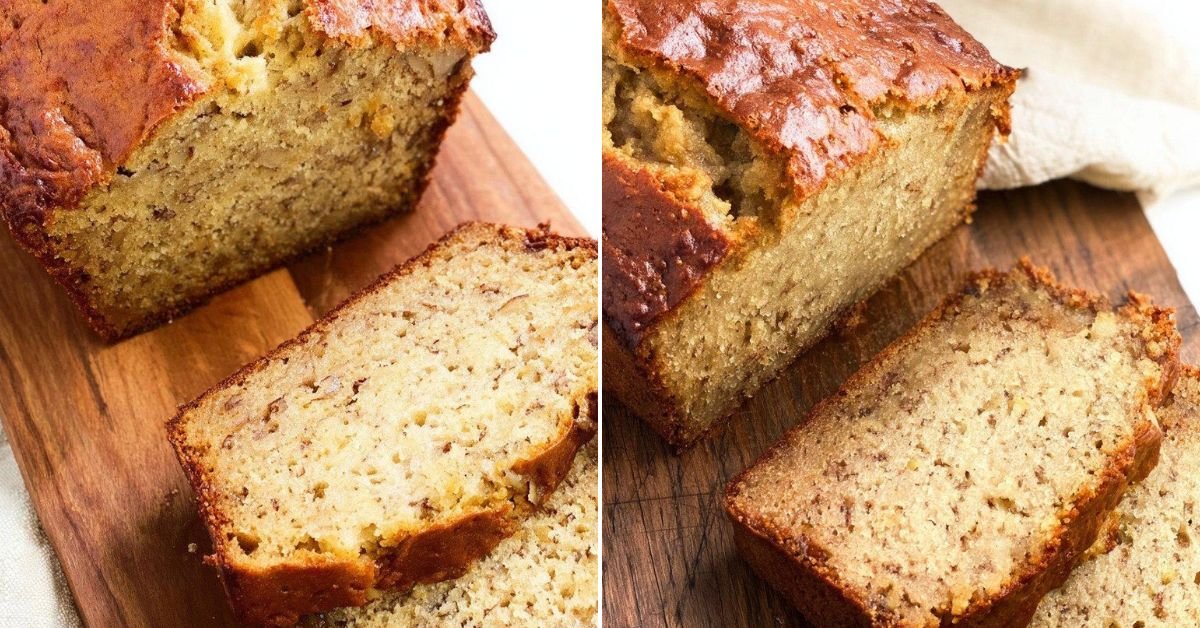
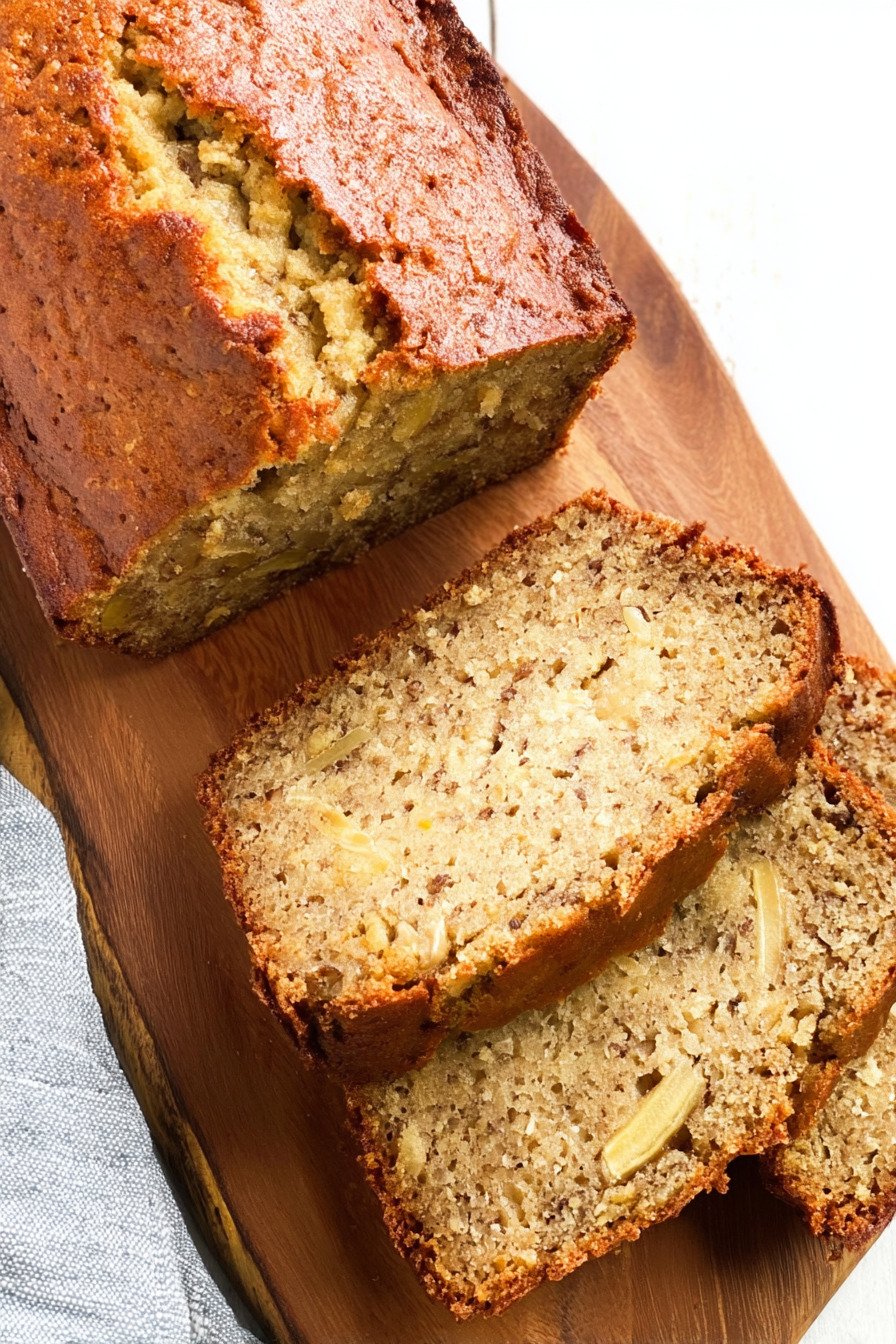
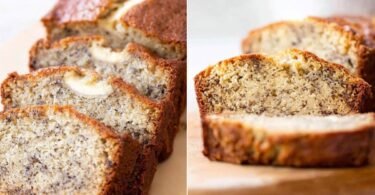
Listen, I’ve tried just about every banana bread recipe out there, and this one beats them all. We’re talking about a 3 ingredient banana bread recipe that got upgraded with a few smart additions. What makes this banana bread recipe different from all the rest? It starts with real melted butter. Not oil, not margarine, but actual butter that gives you that rich, bakery style flavor.
The beauty of this 4 banana bread recipe easy approach is that you literally toss everything into one bowl. No stand mixer required. No complicated techniques. Just a fork for mashing bananas and a wooden spoon for stirring. I’ve made this on lazy Sunday mornings when I can barely function, and it still turns out perfect every single time.
What really sets this apart is the brown sugar. Most recipes call for white sugar, but brown sugar adds moisture and this deep, almost caramel like flavor that white sugar just can’t match. When you combine that with overripe bananas (the browner the better, trust me), you get a banana bread that stays soft for days. Not that it’ll last that long once people get a taste.
I’ve served this at brunches, packed it in lunchboxes, and given loaves as gifts. Every single time, people ask for the recipe. They’re shocked when I tell them how simple it is. This best homemade bread doesn’t require any fancy ingredients or special equipment. Everything you need is probably already sitting in your kitchen right now.
Whether you’re brand new to baking bread recipes or you’ve been making them for years, this one delivers. The texture is tender without being cake like. The banana flavor shines through without being overwhelming. And that golden brown crust? Perfect for slathering with butter while it’s still warm from the oven.

3) Ingredients for Banana Bread
All Purpose Flour forms the base of this recipe. I stick with regular all purpose flour because it gives you that classic texture everyone loves. Some people ask about whole wheat or other alternatives, and sure, you can experiment. But for your first time making this, go with all purpose. It’s reliable and you’ll get consistent results every time. If you’re curious about trying banana bread with coconut flour, you can swap out about a quarter cup of the all purpose flour with coconut flour. Just don’t go overboard or your bread will turn out dry and crumbly.
Baking Soda is what makes your bread rise and get that light, fluffy texture. Don’t confuse it with baking powder – they’re not the same thing. Baking soda reacts with the natural acids in the bananas to create those little air pockets throughout the bread. It’s one of those ingredients you can’t skip or substitute. Make sure yours isn’t expired by checking the date on the box. Old baking soda won’t give you the lift you need.
Salt might seem like a tiny detail, but it actually makes all the flavors pop. We’re only using a quarter teaspoon, so it won’t make your bread taste salty. What it does is balance out the sweetness and make the banana flavor taste even more banana like, if that makes sense. Skip it and your bread will taste flat and one dimensional.
Butter is where the magic happens. And I mean real butter, melted. Not softened, not room temperature, but completely melted. This is what gives you that rich, buttery flavor and keeps the bread incredibly soft. You could use oil or even applesauce if you’re watching calories, but honestly? The butter is what makes this recipe special. Don’t skimp here. Melt it in the microwave for about 30 seconds and let it cool slightly before adding it to your batter.
Brown Sugar beats white sugar hands down for this recipe. The molasses in brown sugar adds moisture and gives you a deeper, more complex flavor. I use three quarters of a cup, which gives you a perfectly sweet bread without being cloying. If you only have white sugar on hand, you can use it, but your bread won’t be quite as rich or stay as soft. Light or dark brown sugar both work fine – I usually grab whatever’s in my pantry.
Eggs bind everything together and add richness. Two eggs is the sweet spot for this recipe. Make sure they’re at room temperature if you can. Cold eggs straight from the fridge can cause your melted butter to solidify into little clumps, and nobody wants that. Just set them out on the counter while you’re gathering your other ingredients. Beat them lightly with a fork before adding them to your bowl.
Vanilla Extract isn’t just for cookies and cakes. That one teaspoon adds a warm, sweet aroma that makes your whole house smell incredible while the bread bakes. Use pure vanilla extract if you’ve got it. The imitation stuff works too, but real vanilla gives you better flavor. I’ve made this recipe hundreds of times, and the vanilla is one of those small details that people notice, even if they can’t quite put their finger on what makes it taste so good.
Overripe Bananas are the star of the show. And when I say overripe, I mean brown and spotty. Those bananas nobody wants to eat anymore? Those are perfect. The browner they are, the sweeter and more flavorful your bread will be. You need three medium sized bananas, which usually weighs out to about one and a half cups of mashed banana. If your bananas aren’t quite ripe enough, you can speed up the process by sticking them in a paper bag overnight or baking them in a 300 degree oven for about 15 minutes.
4) How to Make Banana Bread
Step 1. Get your oven heating to 350 degrees. This is the perfect temperature for baking banana bread. Too hot and the outside burns before the inside cooks through. Too cool and you’ll end up with a dense, gummy texture. While the oven’s warming up, grab your loaf pan and grease it really well. I like using butter, but cooking spray works great too. If you want to be extra careful about getting the bread out in one piece, line the bottom and sides with parchment paper. Leave some overhang on the sides so you can use it like handles to lift the bread out later.
Step 2. Grab a large mixing bowl and your three overripe bananas. Use a fork to mash them up until they’re completely smooth. Don’t leave any big chunks – you want it to look almost like banana pudding. This takes maybe two minutes of mashing. Some people like to leave a few small lumps for texture, but I prefer mine smooth. The smoother your bananas, the more evenly distributed the flavor will be throughout your bread.
Step 3. Pour that melted butter right into the bowl with your mashed bananas. Give it a good stir with a wooden spoon. The mixture might look a little weird at first, kind of separated and oily, but that’s totally normal. Just keep stirring until it comes together. The warm butter will blend right into those bananas and create this rich, creamy base for your batter.
Step 4. Now dump in your brown sugar, beaten eggs, and vanilla extract. Stir everything together until it’s well combined. The sugar will start to dissolve and the whole mixture will get lighter in color and fluffier in texture. This is where your batter starts to smell amazing. Take a minute to really mix it well – you want that sugar fully incorporated before you add your dry ingredients.
Step 5. Time to add your baking soda, salt, and flour. Sprinkle them over the top of your wet ingredients and then gently fold them in with your wooden spoon. Here’s where a lot of people mess up. They get overzealous with the mixing. You want to stir just until you can’t see any dry flour anymore. A few streaks are fine. Overmixing develops the gluten in the flour and gives you tough, chewy bread instead of tender, soft bread. Mix until just combined and then stop. Your arm might want to keep going, but resist the urge.
Step 6. Pour your batter into that prepared loaf pan. Use a spatula to scrape out every last bit from the bowl. Smooth the top gently so it bakes evenly. Don’t stress about making it perfect. It’ll settle and smooth out as it bakes anyway.
Step 7. Pop that pan into your preheated oven and set a timer for 50 minutes. Every oven bakes a little differently, so start checking around the 45 minute mark. Grab a toothpick or cake tester and stick it right into the center of the loaf. If it comes out with wet batter on it, give it another five minutes and check again. When it’s done, the toothpick should come out clean or with just a few moist crumbs clinging to it. The top should be golden brown and spring back when you gently press it with your finger.
Step 8. Take the pan out of the oven and let it cool for about 10 minutes. Don’t try to remove the bread right away or it might fall apart. After 10 minutes, run a butter knife around the edges to loosen it, then turn it out onto a wire cooling rack. If you used parchment paper, just grab those overhanging edges and lift the whole loaf right out. Let it cool completely before slicing, if you can wait that long. I usually can’t resist cutting into it while it’s still warm and slathering on some butter. Use a sharp bread knife to cut clean slices without squishing the bread.
5) Tips for Making Banana Bread
Room temperature ingredients make a huge difference. I know I mentioned this already with the eggs, but it really does matter. When your eggs and butter are roughly the same temperature, they mix together smoothly and evenly. Cold ingredients can cause your batter to look curdled or separated, which isn’t the end of the world, but it’s not ideal either. Just plan ahead and pull your eggs out of the fridge about 30 minutes before you start baking.
Don’t throw away those banana peels without checking them first. Sometimes the ripest, sweetest bananas look absolutely disgusting on the outside but are perfect on the inside. I’ve had bananas that were almost black on the outside that made the best banana bread I’ve ever tasted. Trust the peel. The darker and spottier, the better. If your bananas have gone full black and are starting to leak, that might be too far. But brown spots? That’s exactly what you want.
Measure your flour correctly and your bread will turn out perfectly every time. Too much flour is the number one reason banana bread turns out dry and crumbly. The best way to measure is to fluff up your flour in the container, spoon it into your measuring cup, and level it off with a knife. Don’t scoop the measuring cup directly into the flour bag or you’ll pack way too much flour into the cup. This one little trick makes a massive difference in your final result.
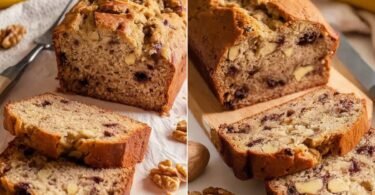
If you want to add mix ins, now’s the time to talk about it. Chocolate chips, chopped walnuts, pecans, or even dried cranberries all work beautifully in this recipe. Fold them in right after you add the flour, right before you pour the batter into the pan. About a half cup to a cup of mix ins is perfect. Any more than that and your bread might not hold together properly. I’m a sucker for chocolate chips personally, but my husband loves it with toasted pecans.
Your loaf pan size matters more than you’d think. This recipe is designed for a standard 9×5 inch loaf pan. If you use a smaller pan, your bread will be thicker and will need longer to bake. Use a bigger pan and your bread will be flatter and might dry out. Stick with the 9×5 size and you’ll get that perfect height and texture every time. If you only have an 8×4 pan, just keep an extra close eye on it and add a few minutes to the baking time.
The toothpick test is your best friend when it comes to knowing if your bread is done. But here’s the thing. You want a few crumbs to cling to that toothpick. If it comes out completely clean, your bread is probably overbaked. A few moist crumbs are perfect. Wet, raw batter means it needs more time. It’s a fine line, but once you make this a few times, you’ll get a feel for exactly what you’re looking for.
6) Making Banana Bread Ahead of Time
This banana bread is actually better the next day. I know that sounds weird, but it’s true. Something about letting it sit overnight lets all the flavors meld together. The texture becomes even more tender and the banana flavor really comes through. So if you’re planning to serve this at a brunch or bring it to a gathering, bake it the night before. Just let it cool completely, wrap it up, and you’re good to go.
You can make the batter ahead too, though I don’t usually bother. If you want to mix everything up in the morning and bake it later in the day, that’s fine. Just cover your bowl with plastic wrap and stick it in the fridge. Bring it back to room temperature before baking, which takes about 30 minutes. The batter might darken slightly from sitting, but that’s just the bananas oxidizing. It won’t affect the taste or texture at all.
Want to really plan ahead? This freezes like a dream. I usually bake two loaves at once. One for eating now, one for the freezer. Once your bread is completely cool, wrap it tightly in plastic wrap, then again in aluminum foil. Write the date on it with a marker and pop it in the freezer. It’ll keep for up to three months. To thaw, just leave it on the counter overnight still wrapped. Or if you’re impatient like me, unwrap it and microwave individual slices for about 20 seconds.
If you’re making this for a specific event, you can prep all your dry ingredients in one bowl and your wet ingredients in another bowl the night before. Cover both and leave them on the counter (except the eggs and butter, those should stay in the fridge). In the morning, just dump them together, give them a quick stir, and pop it in the oven. You’ll have fresh baked banana bread in about an hour with minimal morning effort.
The mix in question comes up a lot. Can you add the chocolate chips or nuts ahead of time? Sure, just toss them in with the flour. But if you’re freezing the bread, I’d leave them out and add them to individual slices when you reheat them. Nuts especially can get a little soft in the freezer. Chocolate chips hold up better, but they can develop a white coating called bloom. It’s totally safe to eat, just doesn’t look as pretty.
7) Storing Leftover Banana Bread
Once your banana bread is completely cool, wrap it up to keep it fresh. I like to wrap the whole loaf in plastic wrap, then stick it in a plastic bag or wrap it again in foil. This double wrapping keeps it from drying out. Left like this on your counter, it’ll stay fresh for about four days. Maybe five if your house is cool and dry. Don’t put it in the fridge unless you absolutely have to. The cold makes bread go stale faster, and nobody wants dry banana bread.
If you’ve already sliced your bread, you can wrap individual slices in plastic wrap or parchment paper. Stack them in a container or freezer bag and they’ll keep just as well. This is actually my preferred method since I can just grab a slice whenever I want one. Pop it in the toaster for about a minute and you’ve got a warm, slightly crispy treat that tastes like it just came out of the oven.
Pay attention to how it looks and smells. Fresh banana bread should smell sweet and banana like. If it starts to smell sour or you see any mold, toss it. Mold usually shows up first on the bottom of the loaf where moisture collects. That’s another good reason to store it wrapped up tight. Less air exposure means less chance for mold to grow. And keep it away from other strong smelling foods. Banana bread absorbs odors like crazy.
Room temperature storage works great for a few days, but if you know you won’t finish the loaf within that time frame, freeze it. Seriously, don’t let it sit on your counter for a week getting progressively more stale. Slice it up, wrap the slices individually, and freeze them. Then you’ve got fresh banana bread whenever you want it for the next three months. It takes like 30 seconds to thaw a slice in the microwave.
If your bread does start to get a little stale, don’t throw it away. Stale banana bread makes incredible French toast. Dip the slices in an egg and milk mixture, fry them in butter, and top with maple syrup. Or cube it up and make bread pudding. You can even crumble it up and use it as a topping for ice cream or yogurt. There are so many ways to use up bread that’s past its prime.
8) Try these Desserts next!

9) Banana Bread Recipe
Banana Bread Recipe That’s Actually Worth Making
Ingredients
- 2 cups all-purpose flour
- 1 teaspoon baking soda
- 1/4 teaspoon salt
- 1/2 cup butter, melted
- 3/4 cup brown sugar
- 2 eggs, beaten
- 1 teaspoon vanilla extract
- 3 overripe bananas, mashed
Instructions
- Get your oven going at 350 degrees. Grease up a loaf pan with butter or cooking spray (I like to line mine with parchment paper too, makes getting it out way easier).
- Grab a large bowl and mash those bananas with a fork until they’re completely smooth. No chunks, please.
- Pour in the melted butter and give it a good stir with a wooden spoon.
- Toss in the brown sugar, beaten eggs, and vanilla. Mix it all together.
- Now add the baking soda, salt, and flour. Stir until everything’s just combined. Don’t go crazy mixing here, we’re not trying to develop gluten.
- Pour the whole thing into your prepared loaf pan.
- Bake for 50 minutes to an hour. You’ll know it’s done when a toothpick stuck in the center comes out mostly clean with just a few crumbs clinging to it.
- Let it cool in the pan for a few minutes, then turn it out onto a wire rack. Slice it up with a bread knife and try not to eat the whole thing in one sitting.
10) Nutrition
Serving Size: 1 slice (1/8 of loaf), Calories: 262, Sugar: 26 g, Sodium: 232 mg, Fat: 2 g, Saturated Fat: 1 g, Carbohydrates: 57 g, Fiber: 3 g, Protein: 6 g, Cholesterol: 41 mg

Leave a Comment